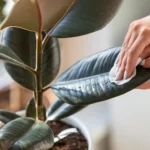
Bunny Ear Cactus, also known as Opuntia microdasys, is a charming and eye-catching succulent that gets its name from its adorable ear-shaped pads. This cactus doesn’t grow long spines like many others; instead, it has tiny hair-like glochids that may look harmless but can irritate the skin if touched. People love growing this cactus indoors and outdoors because of its minimal care requirements and its aesthetic appeal. Propagating this cactus is one of the easiest ways to grow multiple plants without spending extra money. Whether you are a beginner plant enthusiast or a seasoned gardener, learning how to propagate Bunny Ear Cactus successfully can help you multiply your collection and enjoy a rewarding gardening experience. In this guide, you’ll learn everything from selecting the right pads to rooting and caring for the new plant.
About Bunny Ear Cactus
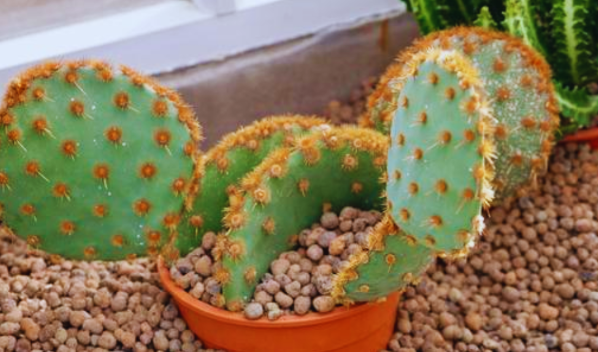
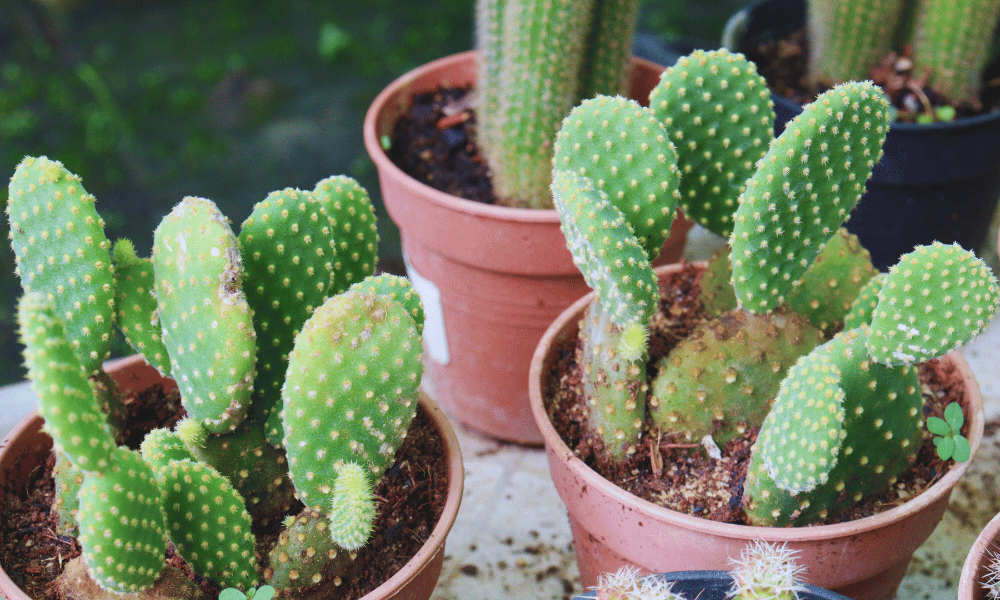
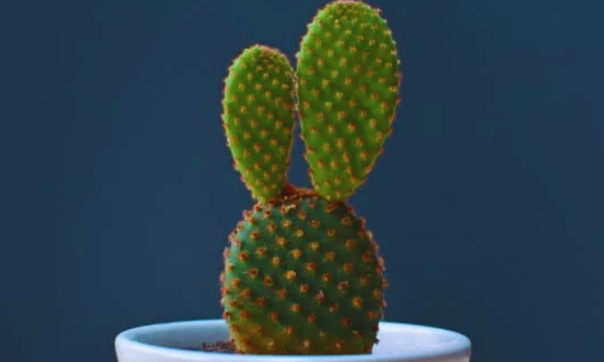
Bunny Ear Cactus, scientifically known as Opuntia microdasys, is a charming member of the cactus family that has gained popularity for its adorable appearance. Native to Mexico, this cactus gets its common name from the way its pads grow in pairs, resembling the ears of a bunny. Unlike traditional cacti with long, sharp spines, this species has tiny glochids—fine hair-like bristles that look soft but can be quite irritating to the skin if touched. The pads are flat, oval-shaped, and covered in evenly spaced yellow or white dots, making it visually striking and perfect for decorative indoor gardening
What Makes Bunny Ear Cactus Unique
Bunny Ear Cactus stands out among other succulents due to its playful shape and compact growth style. Unlike tall column cacti, this species grows in branching pad segments that resemble bunny ears. Each pad is covered in evenly spaced clusters of glochids that give it a dotted pattern, making it a decorative plant even without flowers. It rarely blooms indoors, but when it does, it produces beautiful creamy yellow flowers followed by reddish-purple fruits. Another unique feature is its slow growth rate, which makes it perfect for small pots and tabletop displays. This cactus doesn’t require frequent watering or high maintenance like other indoor greens. What makes it even more fascinating is how easy it is to propagate. A single pad can transform into a whole new plant with just a few simple steps. This unique ability makes it ideal for plant lovers who enjoy growing and sharing succulents.
Benefits of Growing Bunny Ear Cactus at Home
Growing Bunny Ear Cactus at home brings multiple benefits beyond just decoration. First, it is an excellent low-maintenance option for busy people who don’t have time for daily plant care. It thrives with minimal watering and adapts well to indoor lighting conditions. Second, it improves indoor aesthetics by adding a natural touch to your desk, window sill, or plant shelf. Because of its compact size, it doesn’t take up much space and looks great in modern minimalist setups. Another benefit is that it helps improve air quality by absorbing toxins like formaldehyde from the air, making your environment cleaner and fresher. Additionally, propagating Bunny Ear Cactus is a fun and educational activity that can be enjoyed by kids and adults. It encourages patience and gives a sense of accomplishment when new roots and pads start to grow. Plus, once propagated, you can gift the new plants to friends or use them to decorate multiple areas in your home.
Can You Propagate Bunny Ear Cactus Easily?
Yes, propagating Bunny Ear Cactus is one of the easiest ways to expand your plant collection, even if you are a beginner. Unlike other plants that require seeds or complicated rooting hormone techniques, Bunny Ear Cactus simply needs a healthy pad to start a new plant. The process doesn’t demand advanced gardening skills, just a little patience and the right conditions. Once you detach a pad and let it dry properly, it will form a callous and prepare itself for root growth.
As long as you provide a well-draining soil mix, avoid overwatering, and ensure adequate sunlight, the pad will slowly develop roots and begin to grow like a mature plant. What makes it even more convenient is that you don’t need to spend extra money on special fertilizers or equipment. With basic tools like gloves, a knife, and a pot, you can turn one cactus into many. That’s why many cactus lovers consider this plant perfect for home propagation.
Best Time of the Year to Propagate
The best time to propagate Bunny Ear Cactus is during the growing season, which typically falls between late spring and early summer. During this period, the cactus is naturally active, meaning it absorbs more energy and responds faster to rooting. Propagating during the warmer months increases the success rate as the pads are more likely to callous properly and develop roots without rotting. Winter is not advisable for propagation because the plant goes into a dormant phase, making it less responsive to growth stimuli.
If you try to propagate during colder months, the pad may stay inactive for a long time or even rot due to lack of sunlight and warmth. Light plays a major role in cactus development, so starting the process when days are longer ensures better results. If you live in a tropical or warm climate, you may be able to propagate almost year-round, but still, spring remains the most ideal timing for faster root development and healthy growth.
Tools and Materials You Will Need
Before starting the propagation process, it’s important to prepare everything you need to ensure smooth and successful growth. Having the right tools not only makes the process cleaner but also prevents damage to the cactus pads. Here’s a checklist of what you’ll need:
Essential Items Checklist
- A pair of thick gloves or gardening gloves to protect your hands from glochids.
- A clean, sharp knife or pruning shears to cut the pads precisely.
- A small pot or container with drainage holes to prevent excess water buildup.
- Cactus or succulent soil mix to ensure proper water drainage.
- Optional: Rooting hormone to speed up root development, although Bunny Ear Cactus usually roots without it.
- A clean workspace or a tray to place the pads while drying.
Optional Items for Better Success Rate
While the cactus can propagate with basic tools, using optional items can increase the success rate. Rooting powder helps seal the fresh cut and prevent fungal infections. You may also use sterilizing alcohol to clean your cutting tool before use to avoid infecting the pad. Mesh screens or small rocks can be placed at the bottom of the pot to improve drainage.
Having spray bottles instead of watering cans helps control moisture levels and prevents overwatering. If you’re working indoors, placing a grow light nearby can help maintain consistent light exposure. While these extras are not mandatory, they are beneficial for beginners who want to ensure a successful propagation with minimal risk.
How to Select Healthy Pads
Choosing the right pad is one of the most important steps in propagating Bunny Ear Cactus successfully. Not every pad is suitable for propagation. You should always select a mature but healthy pad with a firm texture and no discoloration. Avoid pads that look shriveled, yellow, or have any signs of rot or fungal infection. A good pad should be thick, well-hydrated, and free from scars or damage. Younger pads might look attractive, but they lack the stored energy needed for rooting. When selecting, gently inspect the pad without squeezing too hard to avoid breaking the delicate glochids. Choose a pad that has grown fully and is at least a few months old. If your cactus has multiple branches, pick a pad that is facing outward for easy cutting. Remember, a strong start begins with choosing a healthy pad, as it directly affects the speed of rooting and overall survival rate.
Step-by-Step Pad Removal Technique
Removing the pad correctly is crucial to avoid damaging both the mother plant and the pad you plan to propagate. Start by putting on gloves to protect your hands from the tiny glochids that can easily stick to the skin. Next, use a clean, sharp knife or sterilized pruning shears to make a clean cut. Avoid twisting or pulling the pad by hand, as this can tear the tissue and increase the risk of infection. Gently cut at the joint where the pad connects to the main plant. Once removed, avoid touching the cut surface directly. Place the pad on a clean surface like a tray or a paper towel. It is recommended to leave the pad in a dry, shaded area immediately after removal to avoid moisture buildup. Proper cutting ensures that the wound heals correctly, reducing the chances of rot and increasing the success rate of propagation.
Callousing – The Most Important Step
Callousing is a critical step that many beginners overlook, but it is what makes cactus propagation different from traditional plant cutting. When you cut a pad, the exposed wound is vulnerable to fungal diseases and rot if planted immediately. To prevent this, the pad needs time to form a hard, protective layer known as a callous. This natural barrier seals the wound and prepares the pad for healthy root development. Without proper callousing, any moisture in the soil can enter the fresh cut and cause the pad to rot before roots appear. This process mimics how cacti naturally propagate in the wild, where broken pads fall off and dry in the sun before rooting. Skipping this step is one of the most common mistakes people make, often resulting in failed propagation. Taking a few extra days to let the pad callous significantly increases the survival rate and ensures stronger growth.
How Long to Let the Pads Dry Before Planting
The drying or callousing period usually takes between 5 to 10 days, depending on temperature and humidity. Place the pad in a dry, airy place away from direct sunlight to prevent sunburn. The goal is not to dry it completely but to let the cut end form a firm, slightly wrinkled seal. You’ll notice that the fresh wound begins to change in texture, forming a thin layer over the surface. In humid climates, it may take slightly longer, while in hot, dry environments, it may callous faster. Avoid rushing this step, even if the pad looks fine after a couple of days. Waiting for the proper callous formation ensures that when you plant it, the pad focuses its energy on root growth instead of trying to heal an open wound. Once the pad feels dry and slightly firm at the base, it’s ready to be planted in soil.
How to Know if Propagation is Successful (Growth Signs to Look For)
After planting your Bunny Ear Cactus pad, patience becomes your best friend. Root growth is invisible at first, so don’t expect immediate changes above the soil. The first sign of successful propagation is stability—if the pad stands firm and doesn’t wobble when gently touched, it means roots are forming underground. Over the next few weeks, you may notice the pad becoming slightly plumper, indicating that it’s absorbing water and nutrients. Another sign is the appearance of tiny new pads, usually sprouting from the top or sides of the existing pad. These fresh pads have a lighter green shade and will gradually develop their own glochids. Sometimes, the pad may wrinkle slightly before root growth begins, which is normal as it uses stored moisture. Just avoid pulling or moving the pad to “check” roots, as this can damage new growth. Instead, let nature take its course and observe gradual, healthy changes.
Common Mistakes to Avoid
Even though propagation is simple, certain mistakes can lead to failure. The most common one is planting the pad too early without letting it callous, which almost always leads to rot. Another big mistake is overwatering, thinking that water accelerates root growth—this cactus prefers to stay dry until roots form. Using the wrong soil, such as regular potting soil that retains too much moisture, is another cause of failure. Placing the pad in low-light conditions slows growth, while exposing it to harsh direct sun too early can burn it. Many beginners also bury the pad too deep in the soil; only the cut end should gently touch the soil surface. Handling the pads with bare hands is also risky, as glochids can cause irritation and lead to sloppy planting. Avoiding these mistakes greatly improves your propagation success rate and ensures a healthy, stress-free start for your new cactus.
Caring for the Newly Propagated Cactus (Full Care Routine)
Once your pad begins rooting, shift your focus toward proper care to support ongoing growth. Watering should remain minimal; wait at least one to two weeks after planting before giving the first light watering. Use a spray bottle instead of pouring water directly. From there, water only when the soil is completely dry, usually every 2–3 weeks depending on your climate. Ensure the pot receives bright but indirect sunlight, especially during the first month.
Once roots are strong, you can gradually move it to a sunnier location. Temperature should stay warm, ideally between 20°C to 30°C (68°F to 86°F). Remove any fallen glochids or debris to maintain hygiene and prevent fungal issues. Do not fertilize immediately; wait until new growth appears, then apply a cactus-specific fertilizer in diluted form every two months. With consistent care, your propagated pad will slowly transform into a full, bushy Bunny Ear Cactus.
FAQs
1. How long does it take for roots to appear?
It typically takes 3–6 weeks for roots to develop, depending on temperature, soil quality, and moisture levels.
2. Do I need rooting hormone for propagation?
Rooting hormone is optional. Bunny Ear Cactus roots naturally, but using hormone powder may speed up the process and reduce rot risk.
3. Why is my cactus pad turning yellow?
Yellowing often indicates overwatering or poor drainage. Stop watering immediately and ensure the pot has proper airflow and a draining soil mix.
4. Can I propagate multiple pads at once?
Yes! You can propagate several pads in separate pots or even in the same container as long as they have enough space and airflow.
5. When should I repot my propagated cactus?
Wait until new pads start forming and the roots are well established—typically after 3–4 months. Repot into a slightly larger pot with fresh soil.
Conclusion
Propagating Bunny Ear Cactus is not just easy but also incredibly rewarding. With just a healthy pad, a bit of patience, and proper care, you can grow multiple new plants without spending extra money. The key to success lies in simple steps—choosing the right pad, allowing it to callous, planting in well-draining soil, and avoiding excessive watering. Observing root development and new pad growth feels like watching nature work its magic. Once rooted, your cactus will continue to grow and branch into a delightful cluster of bunny-ear-shaped pads, making it a beautiful addition to any space. Whether you’re a beginner or an experienced plant lover, this propagation method offers a fun and fulfilling gardening experience that you can even share with others by gifting new plants.