
Elephant ear plants, with their striking, oversized leaves, can turn any garden into a lush, tropical paradise. However, these beauties come with a catch. Their fast-growing nature and robust root systems can quickly take over, making them a challenge to control. Left unchecked, their invasive roots can crowd out other plants, disrupt your garden’s balance, and even damage nearby structures like walkways or pipes.
Managing the roots of elephant ear plants is crucial to prevent them from becoming a nuisance. Whether you’re dealing with a small patch or an overgrown jungle of these plants, the key lies in tackling their roots effectively. This guide will walk you through various methods, from manual removal and chemical treatments to eco-friendly alternatives, ensuring you can reclaim your garden space. With persistence and the right approach, even the toughest elephant ear roots can be managed or eliminated entirely. Ready to take back control of your garden? Let’s dive in!
Why Manage Elephant Ear Plants?
Elephant ear plants are prized for their stunning foliage and ability to create a dramatic, tropical ambiance. However, their aggressive growth habits can quickly turn them from an ornamental treasure into a problematic invader. These plants thrive in warm, moist environments and spread rapidly through their underground tubers and rhizomes, which can easily take over garden beds and landscapes.
Uncontrolled elephant ear roots can outcompete other plants for nutrients, water, and space, leading to a loss of biodiversity in your garden. Their extensive root systems can also cause structural damage to pathways, pipes, and drainage systems, creating costly repairs. For those in regions where these plants are considered invasive, unchecked growth may even disrupt local ecosystems.
Managing elephant ear plants is essential to maintain a balanced and healthy garden. Whether you wish to keep their growth in check or eliminate them entirely, proactive control ensures that your garden remains a space of beauty, not an overrun jungle.
The Problem with Uncontrolled Growth
Elephant ear plants, while visually stunning, can become a significant problem when their growth is left unchecked. These plants are known for their fast-spreading underground tubers and rhizomes, which allow them to multiply rapidly. Without proper management, their expansive root systems can overtake garden beds, lawns, and even water features, leaving little room for other plants to thrive.
One major issue with uncontrolled growth is competition. Elephant ear plants consume a large amount of nutrients and water, starving surrounding plants. This can lead to a monoculture where only elephant ear plants dominate, diminishing the diversity and health of your garden.
Additionally, their roots can damage infrastructure. They may invade drainage systems, disrupt pathways, and interfere with underground utilities, leading to costly repairs. In regions where they are considered invasive, they can harm local ecosystems, displacing native plants and wildlife. Managing their growth is crucial to maintaining balance and preventing long-term damage to your garden and environment.
Understanding Elephant Ear Plants
Elephant ear plants are tropical perennials belonging to the genera Colocasia, Alocasia, and Xanthosoma. Known for their impressive, heart-shaped leaves that resemble an elephant’s ears, these plants add a bold, dramatic touch to gardens and landscapes. Native to Asia and the Pacific Islands, they thrive in warm, humid climates and are often grown as ornamentals or for their edible corms in certain species like Colocasia esculenta (taro).
These plants grow quickly, with underground tubers and rhizomes acting as their primary reproduction method. Once established, elephant ear plants can spread aggressively, creating dense clusters. While their foliage is their most striking feature, their root systems can become problematic. The tubers store nutrients, allowing the plant to regenerate even after being cut back, making them difficult to control or eradicate entirely.
Elephant ear plants are versatile and can grow in various conditions, from garden beds to ponds. However, this adaptability also makes them invasive in some areas. Their rapid growth and ability to outcompete other plants can disrupt ecosystems and harm native vegetation.
Understanding their growth habits and potential impact is essential for managing them effectively. Whether you want to enjoy their tropical charm or remove them from your space, knowing their characteristics is the first step to successful control.
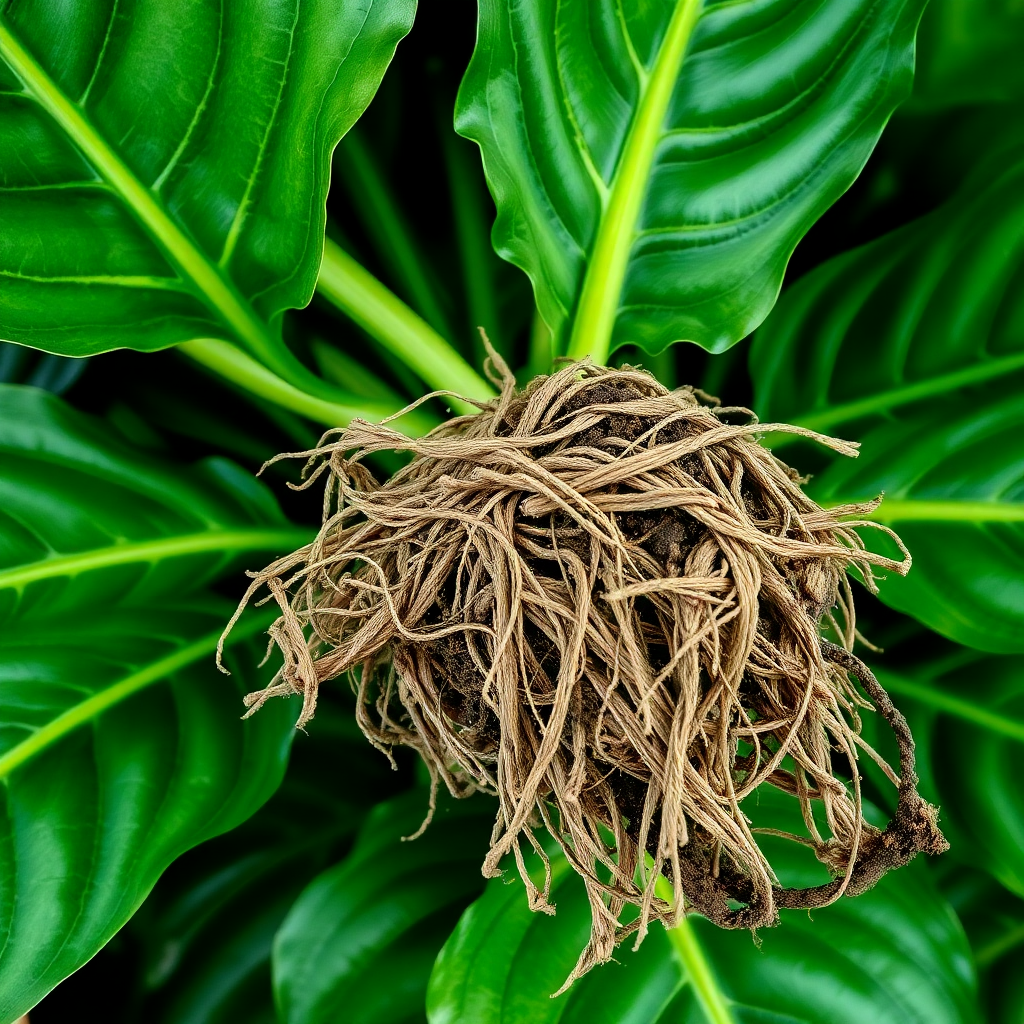
Why the Roots Are Difficult to Kill?
The roots of elephant ear plants are notoriously difficult to eliminate due to their robust structure and regenerative capabilities. These plants reproduce through underground tubers and rhizomes, which act as storage centers for nutrients. Even if the visible parts of the plant are removed, these tubers can remain dormant in the soil and sprout new growth when conditions are favorable.
One challenge is their resilience. The tubers are designed to survive harsh conditions, including droughts or frost, and can remain viable for years. They can regenerate even from small fragments left in the ground, making complete removal a meticulous and time-consuming process.
Another reason is their deep root systems. Elephant ear plants can send roots several inches or even feet into the soil, making it difficult to dig them out entirely. If any portion of the root remains, it can regrow and spread.
Their adaptability adds to the difficulty. They thrive in various environments, including waterlogged soil and dry conditions, which means they can persist in many garden types. For successful management, it’s essential to combine strategies like thorough digging, chemical treatments, or natural inhibitors to prevent these resilient plants from reestablishing themselves.
Preparations for Root Removal
Successfully removing the roots of elephant ear plants requires proper planning and preparation to ensure the process is effective and efficient. Before diving in, here’s what you need to consider and gather:
1. Assess the Area
Evaluate the extent of the plant’s spread. Determine if the roots have invaded nearby plants, structures, or drainage systems. This helps you decide on the level of effort and tools required.
2. Gather the Right Tools
You’ll need sturdy gardening gloves, a sharp spade or shovel, a garden fork, and possibly a pruning saw for tougher roots. For chemical treatments, purchase a suitable herbicide labeled for tuberous or rhizome control.
3. Wear Protective Gear
Some species, like Colocasia, can cause skin irritation due to calcium oxalate crystals. Wear gloves, long sleeves, and goggles to protect your skin and eyes.
4. Water the Soil
If you plan to dig the roots, water the area thoroughly a day before. Moist soil is easier to work with and reduces the risk of leaving fragments behind.
5. Plan for Disposal
Decide how you’ll dispose of the removed roots. Avoid composting them, as they can regrow. Bag them securely and dispose of them according to local guidelines.
Preparation is key to ensuring the roots are effectively managed and the plant doesn’t return.
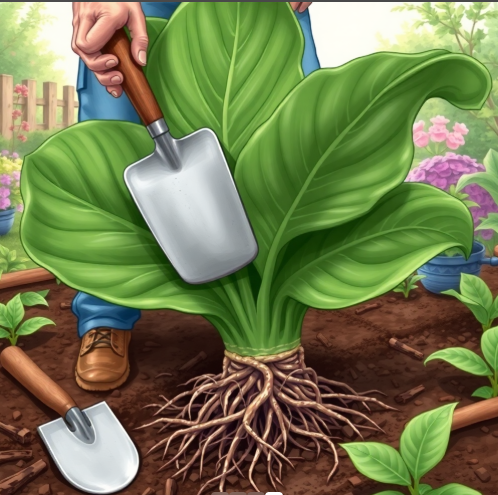
How to Dig Out Elephant Ear Roots?
Digging out elephant ear roots is a straightforward yet labor-intensive method. To ensure success and prevent regrowth, you need to approach the process systematically. Here’s a step-by-step guide:
1. Loosen the Soil
Start by watering the soil around the plant a day before removal. This softens the ground, making it easier to dig and reducing the risk of breaking the roots or tubers.
2. Cut Back the Foliage
Use sharp garden shears to trim the leaves close to the base of the plant. This clears the area for digging and makes handling the plant easier.
3. Dig Around the Plant
Insert a spade or shovel about 12–18 inches away from the plant base to avoid damaging the tubers. Dig in a circular pattern around the plant, working your way deeper with each pass.
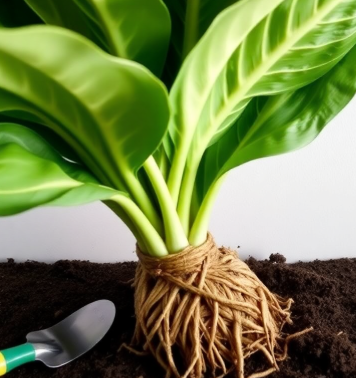
4. Lift the Root System
Once the soil is loosened, use a garden fork or your hands to carefully lift the tubers and roots out of the ground. Inspect the soil for any leftover fragments, as even small pieces can regenerate.
Dealing with Large and Deep Roots
Large and deeply embedded roots require extra effort and the right tools.
- Use a Pruning Saw: For roots that are tough to cut with a spade, a pruning saw can help sever the larger, more stubborn parts.
- Excavate in Layers: Dig in layers if the roots extend deep into the soil, ensuring you reach the entire root system.
- Check Nearby Soil: The root system may extend far beyond the plant’s base. Dig wider to ensure no hidden tubers are left behind.
- Dispose Properly: Bag all the roots securely and avoid composting them to prevent accidental regrowth.
Using Chemical Methods to Remove Elephant Ear Roots
Chemical methods can be an effective way to kill elephant ear roots, especially for large or invasive plants that are difficult to remove manually. Herbicides work by targeting the plant’s growth system, ensuring that the roots and tubers are destroyed, reducing the chance of regrowth.
1. Choose the Right Herbicide
Select a systemic herbicide labeled for use on tuberous or rhizome plants. Glyphosate-based products are popular because they are absorbed by the plant and travel to the roots, effectively killing the entire system.
2. Prepare the Plant
Cut back the leaves and stems to expose the remaining stump or crown of the plant. This reduces surface area and ensures the chemical focuses on the root system.
3. Apply the Herbicide
Follow the manufacturer’s instructions carefully. Use a brush or sprayer to apply the herbicide directly onto the cut surfaces or the exposed base. Be cautious to avoid contact with surrounding plants or soil, as this may harm other vegetation.
4. Monitor and Reapply
It may take a few weeks for the herbicide to fully kill the plant. Monitor the area for new growth and reapply if necessary to ensure no tubers remain viable.
5. Environmental Considerations
Use chemicals responsibly, especially near water sources, as herbicides can harm aquatic life. Always adhere to local regulations for chemical use and disposal.:
Using Chemical Methods to Remove Elephant Ear Roots

Chemical methods can effectively kill elephant ear roots, especially for large, invasive plants. This approach targets the roots and tubers, ensuring complete elimination. Follow these steps to use chemicals safely and effectively:
1. Select the Right Herbicide
- Use a systemic herbicide, such as one with glyphosate, which penetrates the plant and kills it from the roots.
- Ensure the product is suitable for tuberous or rhizome plants.
2. Prepare the Plant for Treatment
- Cut back leaves and stems to expose the base of the plant.
- Leave enough surface area for the herbicide to absorb effectively.
3. Apply Herbicide Properly
- Follow label instructions for safe application.
- Use a sprayer or brush to apply the herbicide directly to the cut stems or exposed root area.
- Avoid spraying nearby plants or soil to prevent unintended damage.
4. Repeat as Needed
- Monitor for regrowth over the next few weeks.
Natural Alternatives to Chemicals
If you prefer to avoid chemicals, there are several natural methods to tackle elephant ear roots effectively. These alternatives are environmentally friendly and safe for surrounding plants, pets, and wildlife. Here are some practical approaches:
1. Boiling Water Treatment
- Pour boiling water directly onto the base of the plant and exposed roots.
- Repeat this process over several days to ensure the tubers are fully cooked and unable to sprout again.
- Effective for smaller infestations or isolated plants.
2. Smothering the Plant
- Cover the area with a thick, dark tarp or heavy mulch to block sunlight and air.
- Leave the cover in place for several weeks to starve the plant of essential resources.
- This method works well for controlling the spread.
3. Saltwater Solution
- Mix a concentrated saltwater solution and pour it directly onto the root area.
- Avoid excessive use, as salt can affect soil quality.
- Effective for killing roots in non-arable areas.
4. Manual Removal
- Dig up the roots and tubers manually with the help of a garden spade or fork.
- Water the area beforehand to make the process easier.
5. Frequent Pruning
- Regularly cut back any emerging shoots to exhaust the plant’s energy reserves over time.
Tips for Maximizing Effectiveness
When removing elephant ear roots, whether using manual, chemical, or natural methods, proper planning and execution are essential for long-term success. Here are some tips to enhance the effectiveness of your efforts:
1. Target the Root System
- Elephant ear plants regenerate from tubers and rhizomes. Ensure you focus on removing or destroying the entire root system. Even small fragments can lead to regrowth.
2. Time It Right
- The best time to remove elephant ear roots is during their active growing season (spring to early fall). During this time, the plant absorbs nutrients, making chemical treatments and manual removal more effective.
3. Prepare the Soil
- Water the area thoroughly a day before digging to soften the soil, making it easier to extract the roots without breaking them.
4. Use the Right Tools
- Use sharp garden shears for cutting and sturdy spades or shovels for digging. A garden fork is ideal for loosening deeper roots.
5. Be Persistent
- Monitor the area regularly for signs of regrowth. Apply additional treatments or remove new shoots promptly to prevent the plant from re-establishing.
6. Combine Methods
- Combine techniques, such as digging and natural methods, for maximum impact. For example, follow manual removal with boiling water treatment to destroy any remaining tubers.
7. Dispose of Plant Material Properly
- Avoid composting elephant ear roots, as they may sprout again. Bag and dispose of them securely to prevent accidental regrowth.
Long-Term Prevention Tips
Once you’ve successfully removed elephant ear roots, implementing preventative measures is essential to stop them from regrowing or spreading. Here are some effective strategies for long-term control:
1. Regular Monitoring
- Check the area regularly for new growth or shoots, especially during the growing season.
- Promptly remove any emerging plants before they establish a new root system.
2. Proper Soil Maintenance
- Avoid leaving root fragments or tubers in the soil, as they can regenerate.
- Use a soil sifter or thoroughly inspect the area after removal to ensure no pieces remain.
3. Barriers and Edging
- Install physical barriers, such as root barriers or deep garden edging, to prevent the spread of underground rhizomes into unwanted areas.
- Ensure the barriers are at least 12-18 inches deep for effectiveness.
4. Mulching
- Apply a thick layer of mulch around the area to suppress new growth by blocking sunlight.
- Organic mulch also improves soil health while preventing weed-like regrowth.
5. Limit Watering
- Elephant ear plants thrive in moist soil. Reduce irrigation in areas where you want to prevent regrowth.
- Ensure proper drainage to avoid creating conditions that favor their growth.
6. Choose Companion Planting
- Introduce competitive ground cover or native plants that outcompete elephant ear plants for nutrients and space.
- These can create a natural barrier against unwanted growth.
7. Proper Disposal Practices
- Never discard tubers, roots, or plant fragments in compost or nearby natural areas.
- Bag and dispose of them in municipal waste to prevent accidental spreading.
Tips for Maximizing Effectiveness
1. Target the Entire Root System
- Elephant ear plants regenerate from leftover tubers or rhizomes. Focus on removing or destroying the entire root system for successful eradication.
2. Choose the Right Timing
- Work during the growing season (spring to early fall) when the plant is actively absorbing nutrients. This makes removal and treatments more effective.
3. Soften the Soil
- Water the area the day before digging to make the soil softer. This prevents roots from breaking apart during removal.
4. Use Proper Tools
- Equip yourself with sturdy tools like a spade, garden fork, and sharp shears to handle tough roots efficiently.
5. Combine Methods
- Mix techniques like manual digging followed by boiling water or salt treatments to ensure no remnants survive.
6. Regular Monitoring
- Inspect the area for new shoots or regrowth regularly and address them immediately before they establish.
7. Dispose of Plant Material Properly
- Bag and dispose of roots and debris in the trash instead of compost to prevent accidental regrowth.
- Avoid overwatering, as moist soil encourages regrowth. Improve drainage in problem areas to discourage the plant’s return.
9. Consider Barriers
- Install root barriers or deep edging to block rhizome spread into controlled areas.
10. Be Persistent
- Successful removal often requires repeated efforts. Stay consistent to achieve lasting results
Conclusion
Managing elephant ear plants, particularly their resilient roots, requires persistence and the right approach. Whether using manual, chemical, or natural methods, addressing the root system is key to preventing regrowth. By combining techniques and following long-term prevention strategies, you can successfully control these plants and maintain a balanced, healthy garden. Regular monitoring, proper disposal, and soil care are essential steps to stop their invasive spread. With patience and consistent effort, you can enjoy a thriving garden free from the challenges posed by elephant ear plants while preserving the environment and surrounding greenery.
FAQs
1. Why are elephant ear roots so hard to kill?
Elephant ear roots are tuberous and resilient, allowing them to store nutrients and regenerate even after removal. Their underground rhizomes spread easily, making complete eradication challenging without proper techniques.
2. What is the safest method to remove elephant ear roots?
Manual removal is the safest method. By digging out the roots and tubers completely, you avoid chemicals and reduce environmental impact. Ensure all fragments are removed to prevent regrowth.
3. Can I compost elephant ear plant debris?
No, composting is not recommended. The roots and tubers may sprout again in the compost, leading to unintentional spreading when the compost is used.
4. How long does it take to eliminate elephant ear plants?
The time frame depends on the method used and the plant’s size. Chemical treatments can take a few weeks, while manual or natural methods may require several months with regular monitoring and follow-up.
5. How can I prevent elephant ear plants from regrowing?
Implement long-term prevention measures like regular monitoring, deep root barriers, proper disposal of plant material, and reducing soil moisture to discourage regrowth.