
Orchids are among the most elegant and rewarding houseplants, but they also have a reputation for being tricky to care for. In reality, once you understand their needs, orchids can thrive and bloom beautifully year after year. Whether you’re a beginner or already own one, this guide will help you keep your orchid alive, healthy, and flourishing.
About Orchids
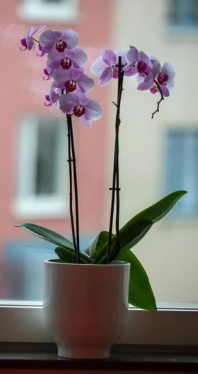
Orchids are one of the largest and most diverse families of flowering plants, with over 25,000 species found worldwide. They are admired for their beauty, elegance, and unique blooms that come in a wide variety of shapes, colors, and patterns. Orchids naturally grow in tropical and subtropical regions, but many species can also adapt to different environments.
One of the most fascinating things about orchids is their specialized root system. Many are epiphytic, meaning they grow on trees and absorb moisture and nutrients from the air rather than soil. Others are terrestrial, growing in the ground like regular plants. Orchids are also known for their long-lasting flowers, which can bloom for weeks or even months under proper care.
How to Choose the Right Orchid ?
The first step in keeping an orchid alive is choosing the right type. Not all orchids are equally easy to care for, so beginners should start with a Phalaenopsis (Moth Orchid). This variety is widely available, affordable, and blooms for months at a time, making it a favorite for new plant parents. Other orchids, like Dendrobium, Oncidium, and Cattleya, are stunning but require slightly more advanced care and may not adapt well to low-maintenance routines. When selecting your orchid, look for healthy green leaves, firm roots, and no signs of pests.
Avoid plants with yellowing foliage or mushy roots. If possible, purchase orchids from reputable garden centers instead of supermarkets, since these usually receive better initial care. Remember, the right start makes all the difference. Choosing a healthy, beginner-friendly orchid increases your chances of success and ensures that your plant thrives for many years with proper attention.
Provide Proper Light
Light is one of the most important factors in orchid survival. Orchids need bright but indirect sunlight to photosynthesize and produce blooms. Too much sun can scorch the leaves, causing them to turn yellow or crispy, while too little light results in dark green leaves and no flowers. Ideally, place your orchid in an east-facing window for morning sunlight or a north-facing window for consistent indirect light. If you only have a south- or west-facing window, filter the light with a sheer curtain to prevent burns. You can also use grow lights if natural light is insufficient, especially in winter. A simple test is the leaf color: medium green leaves indicate proper light. Too dark means more light is needed, while yellowish leaves signal overexposure. Correct lighting encourages healthy growth, supports blooming, and keeps the orchid alive. Always monitor the plant’s response to find the perfect spot.
Water the Right Way
Watering orchids correctly is crucial, as overwatering is the leading cause of death. Unlike typical houseplants, orchids grow in bark, sphagnum moss, or special orchid mixes, not regular soil, so their roots need air circulation. Follow these watering guidelines:
- Check first: Water only when the top inch of the potting medium feels dry.
- Use the soak-and-drain method: Run lukewarm water through the pot until it drains fully.
- Never let roots sit in water, as this causes root rot.
- Morning watering is best, giving the plant time to dry before night.
On average, most orchids need watering about once a week indoors, though this may vary by season. Watch the roots—green roots mean hydrated, silvery roots mean thirsty. Correct watering keeps the plant hydrated, prevents disease, and helps sustain long-lasting blooms, ensuring your orchid thrives instead of struggles.
Ensure Good Humidity and Airflow
Orchids naturally grow in tropical environments, meaning they need higher humidity levels than most indoor spaces provide. Ideally, maintain 40–60% humidity around your orchid for healthy roots and leaves. Here’s how to achieve it:
- Place the pot on a humidity tray filled with pebbles and water.
- Mist the leaves lightly in the morning (but avoid misting flowers).
- Group several plants together to create a mini-humid environment.
- Use a humidifier in dry climates or during winter heating.
Air circulation is equally important. Orchids dislike stagnant air, which can lead to fungus, mold, and pests. Position your orchid in a room with gentle airflow, like near a ceiling fan on a low setting or an open window. Just avoid placing it directly in a draft. Balancing humidity and airflow mimics the orchid’s natural habitat, helping it stay alive and flourish beautifully.
Fertilize Regularly
Like all plants, orchids require nutrients to grow and rebloom. In nature, orchids absorb trace elements from rainwater and decaying organic matter. Indoors, you must provide these nutrients with a balanced orchid fertilizer. Follow the simple rule: “weekly, weakly.” This means feeding with a diluted fertilizer (about half the recommended strength) every week during active growth. For beginners, a 20-20-20 fertilizer is effective, but ensure it’s labeled safe for orchids. During the blooming phase, fertilizing encourages larger and longer-lasting flowers. After flowering, when the orchid rests, reduce feeding to once a month. Always water the orchid before fertilizing to avoid root burn. Avoid overfeeding, as excess salts can damage the roots and leaves. Fertilizing correctly gives orchids the energy they need for strong roots, lush leaves, and consistent blooms year after year. With proper feeding, your orchid will stay healthy and vibrant long term.
Repot When Necessary

Repotting orchids is essential to their survival because their potting medium eventually breaks down and suffocates roots. Orchids typically need repotting every 1–2 years, usually after blooming. Signs that it’s time include roots growing out of the pot, a foul smell, or the medium turning mushy. Here’s how to do it:
- Gently remove the orchid from its pot.
- Rinse roots and trim away any dead, mushy, or brown sections.
- Place the orchid in a clear plastic pot with fresh orchid mix (bark, sphagnum moss, or perlite).
- Ensure proper drainage holes.
Repotting not only refreshes the medium but also prevents root rot and pests. Clear pots are useful because they allow you to monitor root health—healthy roots should be green and firm. With fresh medium and space to grow, orchids thrive, making repotting one of the best ways to keep them alive long-term.
Care After Blooming
Orchid blooms may last for weeks or months, but eventually, flowers fade. Many people mistakenly think their orchid has died, but this is simply its resting period. After blooming, proper care ensures future reblooms:
- If the flower spike is still green, cut just above a node (small bump) to encourage a side shoot and possibly more blooms.
- If the spike turns brown and dry, trim it back to the base.
- Continue with normal watering, light, and feeding, as the plant is storing energy for its next flowering cycle.
During this time, new leaves and roots often emerge, signaling healthy growth. Be patient—some orchids rebloom in a few months, while others take longer. Caring for the plant after blooming instead of discarding it ensures a continuous cycle of beauty. With the right attention, orchids can rebloom every year, bringing long-lasting joy.
Watch for Pests and Diseases
To keep orchids alive, you must watch for pests and diseases that can damage them. Common problems include:
- Mealybugs, aphids, and scale: These insects suck sap and weaken the plant. Wipe leaves with a cotton swab dipped in rubbing alcohol or use insecticidal soap.
- Spider mites: Cause yellow speckled leaves; improve humidity and wipe leaves regularly.
- Root rot: Caused by overwatering. Trim affected roots and repot in fresh medium.
- Fungal leaf spots: Appear when there’s poor airflow or excess moisture. Improve circulation and remove infected leaves.
Prevention is easier than cure. Always inspect new orchids before bringing them home, avoid overcrowding plants, and maintain good airflow and hygiene. Regularly check leaves, flowers, and roots for signs of distress. By acting quickly against pests or diseases, you protect your orchid’s health and ensure it continues to thrive. Healthy orchids are resilient and can live for many years.
Conclusion
Patience is one of the most important aspects of orchid care. Unlike many houseplants, orchids grow slowly and follow natural blooming cycles. After flowers fade, the orchid enters a resting phase, which can last several months. During this time, it focuses on building strong roots and healthy leaves. Beginners often think their orchid has died, but in reality, it is conserving energy for its next bloom. The key is to continue proper care—provide the right light, water, fertilizer, and humidity even when no flowers are present. With time, you’ll notice new growths or spikes, signaling another bloom is on the way. Some orchids bloom once a year, while others bloom multiple times. If cared for correctly, orchids can live for decades. Patience ensures you don’t give up too soon and allows you to enjoy the reward of long-lasting, spectacular flowers.
FAQ
1. How often should I water my orchid?
Most orchids need watering once a week. Check the potting medium—if the top inch feels dry, it’s time to water.
2. Where should I place my orchid?
Place orchids in bright, indirect sunlight. An east- or north-facing window is ideal.
3. Why are my orchid’s leaves turning yellow?
Yellow leaves may indicate too much sunlight, overwatering, or natural aging of older leaves.
4. Do orchids need fertilizer?
Yes, use a balanced orchid fertilizer (20-20-20) at half strength every 2–4 weeks during active growth.
5. Can an orchid rebloom after the flowers fall off?
Yes. With proper care—light, water, and patience—orchids can rebloom year after year.