
Elephant ear plants are a popular choice for indoor gardening because of their large, eye-catching leaves and tropical look. These plants instantly bring a vibrant and lush feel to any space. Whether you’re a beginner or a seasoned plant enthusiast, elephant ear plants are relatively easy to care for with the right setup.
They are native to warm, humid regions, making them perfect for bright, indirect sunlight and a little extra moisture. While they do need some attention to thrive, their dramatic foliage is worth the effort.
In this guide, you’ll learn everything you need to know about growing and caring for indoor elephant ear plants. From choosing the right spot and soil to watering, fertilizing, and troubleshooting common issues, we’ve got you covered. With a little love and care, your elephant ear plant will become a stunning centerpiece in your home.
What Is an Elephant Ear Plant?
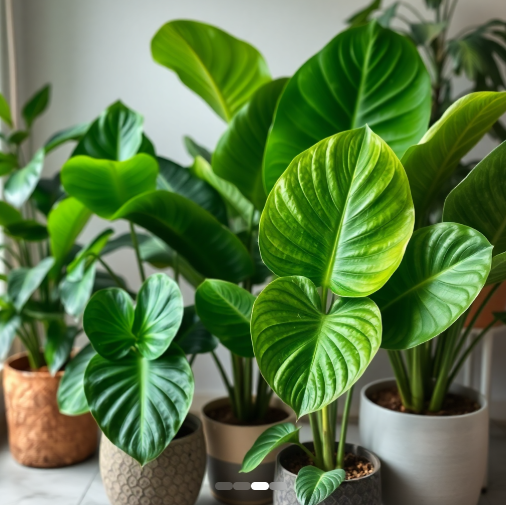
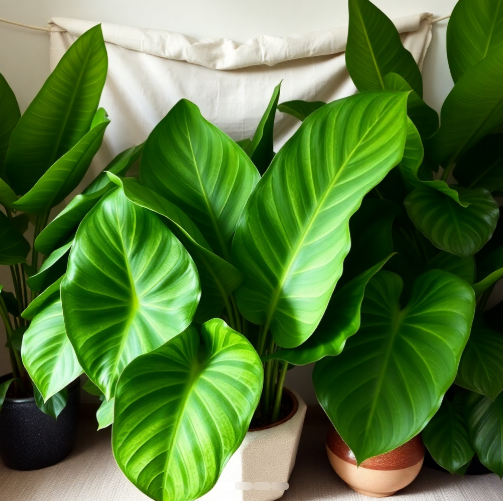
Elephant ear plants are tropical perennials known for their large, dramatic leaves resembling the ears of an elephant—hence their name. These plants belong to the Araceae family and are typically classified under the genera Alocasia, Colocasia, and Xanthosoma. They are widely admired for their striking foliage and are a favorite choice for indoor and outdoor gardens.
Overview of the Plant Species
Elephant ear plants come in several species, each with unique features:
- Alocasia: Known for its glossy, arrow-shaped leaves and pronounced veining. Often referred to as “African Mask” or “Kris Plant,” Alocasia has a more upright growth habit.
- Colocasia: Features heart-shaped leaves that droop downwards. These plants are commonly called “Taro” and thrive in wetter conditions.
- Xanthosoma: Similar to Colocasia but with a more matte leaf texture and a preference for well-drained soil.
Origin and Natural Habitat
Elephant ear plants are native to tropical and subtropical regions of Southeast Asia, South America, and parts of Central America. They naturally grow in rainforest understories, wetlands, and along riverbanks, where humidity levels are high, and sunlight is filtered through tree canopies.
In their natural habitat, they often grow near water sources, which explains their love for moist soil and humid air. When kept as houseplants, replicating these conditions ensures they thrive and display their lush, vibrant foliage.
Why Elephant Ear Plants Are Popular Houseplants
Elephant ear plants have gained popularity as houseplants for several reasons. Their dramatic appearance and easy-to-maintain nature make them a favorite among plant enthusiasts. Here’s why they’re such a hit:
1. Stunning Visual Appeal
The oversized, heart-shaped leaves of elephant ear plants create an instant tropical vibe in any indoor space. Their bold green foliage often features unique textures and patterns, making them a living piece of art.
2. Air-Purifying Benefits
Like many houseplants, elephant ears can improve indoor air quality. They help filter toxins and increase humidity, making your home a healthier environment.
3. Versatility in Decor
These plants fit seamlessly into various interior styles, from modern to bohemian. Their towering leaves add height and depth to indoor plant displays.
4. Low Maintenance
Despite their exotic look, elephant ear plants are relatively easy to care for. With the right lighting, watering, and humidity, they thrive without much fuss.
5. Mood-Boosting Qualities
Having greenery around has been proven to reduce stress and boost mood. The lush, vibrant presence of an elephant ear plant can instantly uplift any space.
6. Variety of Options
Elephant ear plants come in various species and cultivars, such as Alocasia and Colocasia, giving you plenty of options to suit your taste and indoor conditions.
Choosing the Right Location
Light Requirements
- Elephant ear plants thrive in bright, indirect sunlight. Direct sun can scorch their delicate leaves, while too little light can result in slow growth and smaller foliage.
- East or west-facing windows are ideal as they provide plenty of natural light without overwhelming the plant.
Best Spots in Your Home
- Living rooms or bedrooms near large windows are great for these plants to receive filtered light.
- Avoid placing them near air conditioning vents or heaters, as extreme temperature changes can stress the plant.
- Bathrooms with good natural light can also work well due to their naturally higher humidity levels.
Selecting the Ideal Pot
Proper Size and Material
- Choose a pot that is 1-2 inches larger in diameter than the plant’s root ball to allow room for growth without overwhelming the roots.
- Use materials like ceramic, terracotta, or plastic. Terracotta is particularly good for regulating moisture, but plastic pots are lighter and easier to move.
Drainage Considerations
- Ensure the pot has drainage holes to prevent waterlogging, as elephant ear plants are sensitive to overwatering.
- Use a saucer or tray beneath the pot to catch excess water, but make sure to empty it regularly to avoid root rot.
The Perfect Soil Mix
Soil Composition
- A well-draining mix is crucial. Combine potting soil, peat moss, and perlite in equal parts for an ideal balance of moisture retention and aeration.
- Avoid dense, heavy soils that can lead to waterlogged roots.
Importance of Good Aeration
- Good aeration ensures oxygen reaches the roots, promoting healthy growth.
- Adding orchid bark or coconut coir to the mix can enhance aeration and mimic the plant’s natural environment.
How to Pot Your Elephant Ear Plant
Potting your elephant ear plant correctly is essential for its growth and health. Follow these simple steps to ensure your plant thrives:
1. Gather Your Supplies
Before you start, make sure you have:
- A pot with proper drainage holes.
- A well-draining soil mix (e.g., potting soil, peat moss, and perlite).
- Gloves to protect your hands.
- A small trowel for handling the soil.
2. Choose the Right Pot
- Pick a pot that’s 1-2 inches larger in diameter than the root ball of the plant to allow room for growth.
- Ensure the pot has drainage holes to prevent water from pooling at the bottom, which could cause root rot.
3. Prepare the Pot
- Add a layer of gravel or small stones at the bottom of the pot to improve drainage.
- Fill the pot halfway with your soil mix, leaving enough space for the plant’s root ball.
4. Remove the Plant from Its Old Pot
- Gently loosen the plant from its current container.
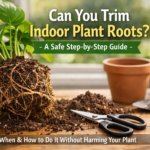
- Check the roots for any signs of damage or disease (brown or mushy roots should be trimmed).
5. Position the Plant
- Place the root ball in the center of the new pot.
- Make sure the plant is at the same depth as it was in the previous pot.
6. Fill with Soil
- Add more soil around the root ball, pressing lightly to eliminate air pockets.
- Avoid over-packing the soil to ensure good aeration for the roots.
7. Water Thoroughly
- Water the plant until it drains from the bottom of the pot.
- Discard any excess water collected in the saucer to prevent soggy roots.
8. Place in the Right Location
- Move the potted plant to a spot with bright, indirect light and adequate humidity.
- Avoid drafty areas or places with sudden temperature changes.
9. Monitor and Adjust
- Over the next few weeks, monitor the plant to ensure it’s adapting well to its new pot.
- Adjust watering and lighting as needed to keep the plant happy.
How Much Water Does an Elephant Ear Plant Need?
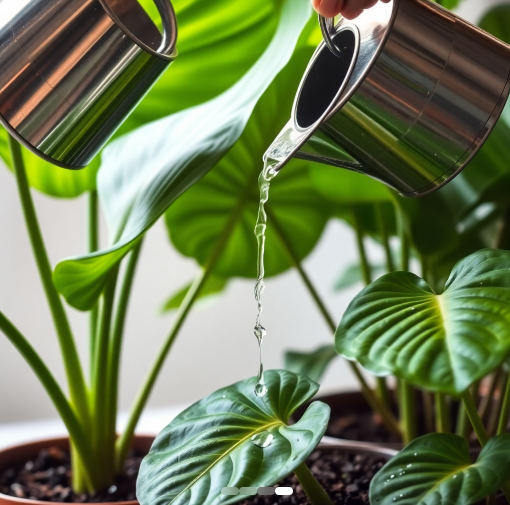
Elephant ear plants thrive in moist, well-drained soil, and understanding their watering needs is essential for their health. These tropical plants prefer consistently moist soil but not soggy conditions. During the warmer months of spring and summer, they need more frequent watering, typically every 2 to 3 days, while in fall and winter, when growth slows, watering should be reduced to about once a week. It’s crucial to check the soil before watering—if the top inch is dry, it’s time to water. Overwatering can lead to yellowing leaves and root rot, while underwatering can cause drooping or browning leaves. Ensure your pot has good drainage, and use room-temperature water to avoid stressing the plant. Since elephant ear plants also enjoy humidity, misting the leaves or using a humidifier can help maintain a moisture-rich environment, especially in dry climates.
- Keep the soil consistently moist but not soggy.
- The top inch of soil should feel slightly dry before watering again.
2. Watering Frequency
- Spring and Summer: During the growing season, water the plant 2-3 times a week, depending on how quickly the soil dries.
- Fall and Winter: Reduce watering to once a week or less as the plant enters its dormant phase.
3. Signs Your Plant Needs Water
- Leaves drooping or curling are common indicators that the plant is thirsty.
- Dry, crumbly soil is another sign that it’s time to water.
4. Avoid Overwatering
- Overwatering can lead to root rot, yellowing leaves, and an unpleasant smell from the soil.
- Always check for proper drainage and ensure the pot doesn’t sit in water.
5. Best Watering Practices
- Use room-temperature water to prevent shocking the roots.
- Water the plant slowly and evenly, ensuring all areas of the soil are moistened.
- Allow excess water to drain completely before placing the pot back in its spot.
6. Humidity Considerations
- Elephant ear plants thrive in high humidity. Consider misting the leaves lightly or using a humidifier to maintain ideal conditions, especially in dry indoor environments.
Caring for Your Indoor Elephant Ear Plant
Elephant ear plants make a bold statement indoors with their large, lush leaves, but they require specific care to thrive. Here’s a comprehensive guide to keeping your plant healthy and vibrant.
1. Provide the Right Lighting
- Place your elephant ear in a spot with bright, indirect sunlight.
- If natural light is insufficient, use a grow light to supplement.
2. Maintain Ideal Temperature and Humidity
- These tropical plants prefer temperatures between 65-75°F (18-24°C).
- Boost humidity with a humidifier, regular misting, or by placing a water tray near the plant.
3. Water Consistently
- Keep the soil evenly moist but not soggy.
- Adjust watering frequency based on the season: more in spring and summer, less in fall and winter.
4. Use the Right Soil Mix
- A well-draining soil mix is essential to prevent waterlogging.
- Include components like peat moss, perlite, and organic compost for optimal growth.
5. Fertilize Regularly
- Feed your elephant ear with a balanced, water-soluble fertilizer every 2-4 weeks during the growing season.
- Reduce feeding in the fall and winter when growth slows down.
6. Prune and Groom
- Trim yellowing or damaged leaves to encourage new growth and maintain aesthetics.
- Wipe the leaves with a damp cloth to remove dust and enhance photosynthesis.
7. Repot When Necessary
- Repot every 1-2 years or when the roots outgrow the current pot.
- Choose a pot that’s 1-2 inches larger in diameter to give the roots room to expand.
8. Monitor for Pests and Diseases
- Watch for common pests like spider mites, aphids, and mealybugs. Use insecticidal soap or neem oil to treat infestations.
- Prevent root rot by ensuring proper drainage and avoiding overwatering.
9. Support During Dormancy
- In cooler months, your elephant ear plant may go dormant.
- Reduce watering and feeding but maintain a stable, warm environment.
10. Rotate for Even Growth
- Rotate the pot weekly to ensure all sides of the plant receive light and grow evenly.
Common Issues and Solutions
Even with the best care, elephant ear plants can face a few challenges. Here’s a look at common problems you may encounter and how to solve them.
1. Yellowing Leaves
- Cause: Yellowing leaves can indicate overwatering, underwatering, or nutrient deficiency.
- Solution:
- Overwatering: Ensure the soil is well-drained and allow the top layer to dry before watering again.
- Underwatering: Check if the soil is too dry and water thoroughly if needed.
- Nutrient Deficiency: Feed the plant with a balanced, water-soluble fertilizer every 2-4 weeks during the growing season.
2. Brown Tips on Leaves
- Cause: Brown tips are often a sign of low humidity, inconsistent watering, or salt buildup from fertilizers.
- Solution:
- Low Humidity: Increase humidity by misting the leaves regularly or using a humidifier.
- Watering: Ensure you’re watering evenly, and never allow the plant to sit in water.
- Fertilizer Salt Buildup: Flush the soil with water once a month to wash out excess salts.
3. Drooping or Wilting Leaves
- Cause: Drooping can be caused by both overwatering and underwatering. It could also be due to too much direct sunlight or stress.
- Solution:
- Overwatering: Check for root rot by inspecting the roots. If they’re mushy, trim the affected roots, change the soil, and repot the plant.
- Underwatering: Water the plant thoroughly and monitor moisture levels more carefully.
- Sunlight: Move the plant to a location with indirect, bright light if it’s getting too much direct sunlight.
4. Pests (Aphids, Spider Mites, Mealybugs)
- Cause: Pests are attracted to elephant ear plants, especially when environmental conditions like humidity or dryness are off balance.
- Solution:
- Spider Mites: Treat with insecticidal soap or neem oil.
- Aphids and Mealybugs: Wipe the affected areas with a damp cloth or use a cotton swab dipped in rubbing alcohol to remove pests.
- Prevention: Regularly inspect the plant and keep it clean to avoid infestations.
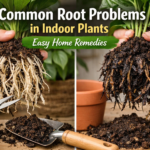
5. Root Rot
- Cause: Root rot is a result of overwatering and poor drainage, leading to soggy roots.
- Solution:
- Remove the plant from the pot and inspect the roots. Trim any rotting parts and repot the plant into fresh, well-draining soil.
- Ensure your pot has proper drainage holes and water the plant only when the top inch of soil is dry.
6. Stunted Growth
- Cause: Poor soil, lack of nutrients, insufficient light, or being root-bound in a pot can cause slow or stunted growth.
- Solution:
- Soil: Repot the plant in a well-draining, nutrient-rich soil mix.
- Light: Move the plant to a brighter location with indirect sunlight.
- Fertilizing: Fertilize the plant regularly during the growing season with a balanced fertilizer to promote healthy growth.
7. Leaves Curling or Wrinkling
- Cause: Curling or wrinkling leaves are often caused by environmental stress such as sudden temperature changes or underwatering.
- Solution:
- Temperature: Avoid placing the plant in areas with drafts or close to heaters or air conditioners.
- Watering: Ensure the plant is consistently watered, but not overly soaked.
How to Propagate Elephant Ear Plants
Propagating elephant ear plants is a fun and rewarding way to create new plants from your existing one. While propagation is relatively straightforward, it requires patience and care. Here’s a detailed guide to propagating elephant ear plants.
1. Propagation Methods: Division and Offsets
Elephant ear plants are commonly propagated by division, which involves separating the plant’s root system into smaller sections that can grow into new plants. This is the most effective and easiest method.
- Best Time to Propagate:
- The best time to propagate is during the spring or early summer when the plant is actively growing.
- Avoid propagating during the dormant phase (fall and winter) when the plant is not in active growth.
2. Preparing the Plant for Propagation
- Step 1: Remove the Plant from the Pot:
- Gently remove the elephant ear plant from its pot.
- Shake off excess soil to expose the root system.
- Be careful not to damage the roots while handling them.
- Step 2: Inspect the Plant:
- Look for healthy offsets or small bulbs that are connected to the main plant.
- The offsets should have their own roots and a few leaves or stems.
3. Dividing the Plant
- Step 1: Separate the Roots:
- Using a clean, sharp knife or scissors, cut the plant into sections, ensuring that each section has a healthy root system and a portion of the stem.
- Try to divide the plant into 2-4 sections, depending on its size and the number of offsets available.
- Step 2: Trim Damaged Roots:
- Trim any damaged or rotting roots. This helps the new divisions to establish healthy root systems.
4. Potting the Divisions
- Step 1: Prepare New Pots:
- Choose pots that are about 2-3 inches larger than the divided root ball.
- Fill each pot with a well-draining potting mix (such as a mixture of peat moss, perlite, and compost).
- Step 2: Plant the Divisions:
- Place each division into its new pot and gently press the soil around the roots to hold it in place.
- Make sure the top of the root ball is level with the soil surface.
5. Caring for New Plant Divisions
- Step 1: Water the Divisions:
- Water the newly potted divisions thoroughly. Ensure the water drains out of the bottom of the pot.
- Keep the soil consistently moist, but not soggy.
- Step 2: Provide Bright, Indirect Light:
- Place the newly potted divisions in a location with bright, indirect sunlight to encourage healthy growth.
- Avoid direct sunlight, as this can scorch the young plants.
- Step 3: Maintain High Humidity:
- New divisions often benefit from higher humidity. You can increase humidity by misting the plants or placing a humidity tray near the pots.
- Alternatively, use a plastic dome or clear plastic bag to create a mini greenhouse effect.
- Step 4: Be Patient:
- Propagating elephant ear plants can take time. It may take a few weeks to a few months for the divisions to establish roots and begin growing actively.
6. Transplanting
- Once the new plant divisions have developed a strong root system and show new growth (typically after a few months), they can be transplanted into larger pots or directly into your garden.
7. Potential Challenges During Propagation
- Rotting Roots: Make sure the pots have good drainage to prevent root rot.
- Slow Growth: If the divisions aren’t growing as expected, check the light, temperature, and moisture levels. If the environment is too dry or too cold, growth may slow down.
Seasonal Care for Elephant Ear Plants
Elephant ear plants thrive in warm, tropical climates and require specific care throughout the year to ensure they stay healthy and vibrant. Their needs change with the seasons, so it’s important to adjust your care routine accordingly. Here’s a guide to help you take care of your elephant ear plant during each season.
1. Spring: The Growing Season
Spring is the start of the growing season for your elephant ear plant. The days are longer, and the temperature rises, making it an ideal time for new growth.
- Light:
- Provide bright, indirect light to support new growth. Avoid direct sunlight, as it can scorch the leaves.
- If your plant is indoors, consider moving it to a brighter spot, or use artificial grow lights if necessary.
- Watering:
- Increase watering as the plant starts to grow. Keep the soil consistently moist but not soggy.
- Make sure the soil drains well to prevent waterlogging and root rot.
- Fertilizing:
- Begin fertilizing your elephant ear plant with a balanced liquid fertilizer once a month to encourage strong, healthy growth.
- Use a slow-release fertilizer for long-term feeding.
- Repotting:
- Spring is a good time to repot your elephant ear if it’s outgrowing its current pot. Choose a pot that’s 2-3 inches larger than the current one to allow room for root expansion.
2. Summer: Peak Growth
During summer, elephant ear plants experience their peak growing season. The warm temperatures and plenty of light help them flourish.
- Light:
- Continue providing bright, indirect sunlight. In some cases, a little morning sunlight can be beneficial, but avoid harsh midday sun.
- If the plant is placed outdoors, ensure it is in a shaded or partially shaded area.
- Watering:
- Elephant ears need frequent watering in the summer. Keep the soil moist but not drenched.
- Water the plant thoroughly, making sure the excess water drains out of the pot.
- If you live in a very hot region, consider misting the leaves to maintain humidity levels.
- Fertilizing:
- Fertilize the plant every 2-3 weeks with a balanced fertilizer to promote healthy foliage. You can also use a high-potassium fertilizer to encourage vibrant leaf color.
- Humidity:
- Elephant ear plants thrive in high humidity, especially in summer. Increase humidity by misting the leaves regularly or placing a humidifier nearby.
- Alternatively, you can place the plant on a humidity tray with pebbles and water to maintain moisture in the air.
3. Fall: Preparing for Dormancy
As temperatures start to cool down in the fall, elephant ear plants begin to slow their growth. It’s time to prepare them for the upcoming winter months.
- Light:
- Continue providing bright, indirect light, but reduce exposure to direct sunlight.
- If the weather cools down significantly, move the plant indoors where temperatures remain stable.
- Watering:
- Water less frequently as the plant enters its dormant phase. Check the soil moisture regularly, and only water when the top inch feels dry.
- Be cautious about overwatering, as this can lead to root rot.
- Fertilizing:
- Stop fertilizing in fall. The plant is preparing to slow down, and excess fertilizer can cause harm to its roots.
- Begin using less water and allow the soil to dry out slightly between waterings.
- Temperature:
- Ensure that the plant is not exposed to drafts or sudden temperature changes. Ideal temperatures for elephant ear plants are between 65°F and 75°F (18°C – 24°C).
4. Winter: Dormant Phase
Winter is the time when your elephant ear plant enters dormancy, especially in colder climates. During this period, the plant requires less attention.
- Light:
- Place your plant in a bright, indirect light spot. As sunlight is weaker in winter, try to move it closer to a window, but avoid direct sunlight.
- If the plant is not getting enough light, consider using a grow light to supplement natural light.
- Watering:
- Watering should be reduced during the winter months. Only water when the top layer of soil is dry, and avoid overwatering.
- The plant will need less water since it’s not actively growing.
- Humidity:
- Winter air tends to be dry, so it’s important to maintain humidity around the plant. Use a humidifier or mist the leaves occasionally.
- Keep the plant away from heaters, as they can dry out the air and stress the plant.
- Temperature:
- Keep the plant in a warm, stable environment. Avoid placing it near drafts, windows, or cold spots. Elephant ear plants prefer temperatures between 60°F and 70°F (16°C – 21°C) during the winter months.
General Tips for Seasonal Care
- Avoid Overwatering: Overwatering is one of the biggest threats to your elephant ear plant, especially in cooler months when it’s not growing as vigorously. Always check the soil before watering.
- Regular Inspection: Look for signs of pests, yellowing leaves, or other issues throughout the year. Catching problems early can prevent further damage.
- Support Stems: As the plant grows taller, the stems may become top-heavy, especially in summer. Consider adding a stake or support to keep the plant upright.
Tips for Decorating with Indoor Elephant Ear Plants
Elephant ear plants bring an exotic and dramatic flair to any space. With their large, stunning leaves and tropical vibe, they make perfect statement pieces in your home décor. Here are some tips for decorating with these majestic plants:
1. Make It a Focal Point
Elephant ear plants have bold, large leaves that immediately grab attention. Use them as focal points in rooms to add visual interest.
- In the living room: Place your elephant ear plant in a corner or near a window where it can grow tall. The plant will naturally draw the eye and create a bold statement.
- In the entryway: A large elephant ear in a stylish pot can greet visitors with a burst of greenery as they enter your home.
2. Pair It with Complementary Plants
Pairing your elephant ear plant with smaller plants can enhance its beauty while creating a lush indoor garden look.
- Low-maintenance companions: Consider pairing it with snake plants, ferns, or peace lilies, which all thrive in similar conditions. These plants won’t overshadow your elephant ear but will complement it.
- Create a tropical vibe: Grouping it with other tropical plants, such as pothos or philodendrons, will bring an exotic, jungle-like feel to your space.
3. Choose the Right Pot
The pot you choose for your elephant ear plant is just as important as the plant itself. A beautiful pot can elevate the overall look.
- Bold and minimalistic: Go for a large, statement pot with a simple design to complement the plant’s size and dramatic leaves. Materials like ceramic, stone, or terracotta work well.
- Consider the color: Choose a pot that contrasts with the green leaves, like a matte black or white pot. If you want the plant to stand out, opt for a pot with a bold, unique design.
4. Use Elephant Ear Plants to Fill Empty Spaces
Elephant ear plants are perfect for filling empty spaces, making them ideal for larger areas that need a touch of life and color.
- In a hallway or stairway: A tall elephant ear plant can be placed in a narrow corner or by a staircase, bringing life to an often-overlooked part of the home.
- In empty corners: A large plant in an empty corner can instantly make the space feel more inviting and alive.
5. Create a Tropical Feel with Decorative Accessories
To enhance the tropical aesthetic, complement your elephant ear plant with other décor items that reflect a natural, relaxed vibe.
- Natural textures: Incorporate items made of wood, bamboo, or rattan to pair with the plant’s tropical nature. Think about wooden shelving units, rattan chairs, or woven baskets.
- Tropical-themed décor: Add tropical prints, bright cushions, or even a hammock in the space to emphasize the jungle-like atmosphere.
6. Use Elephant Ear Plants for Vertical Interest
Since elephant ear plants can grow quite tall, they work well for creating vertical interest in a room.
- In tall ceilings: Place your plant near a window with high ceilings. The plant’s large leaves will stretch upwards, making the most of the vertical space.
- Create a plant wall: Combine multiple elephant ear plants of different sizes on shelves or in tall pots to create a “living wall” effect.
7. Embrace the Drama
Elephant ear plants are dramatic by nature, and they love to be the center of attention. Embrace their boldness and make them the star of the room.
- Use a single plant as the main décor: Sometimes, less is more. Allow one large, well-maintained elephant ear plant to be the centerpiece of your living room, dining area, or bedroom.
- Lighting: Highlight the plant with spotlights or accent lighting to emphasize its large, glossy leaves. A well-lit elephant ear plant can cast beautiful shadows on the wall, adding to its visual appeal.
8. Place Them Near Windows
Elephant ear plants thrive on bright, indirect light, so place them in locations that receive ample natural light, such as near large windows.
- By the living room window: A tall elephant ear can look stunning next to a large window, where it gets the light it needs to grow strong.
- In a sunroom: If you have a sunroom, this is an ideal spot for your elephant ear. It will love the bright but indirect light and look beautiful in the space.
9. Create Contrast with Furniture
Contrast your elephant ear plant with sleek, modern furniture to create a balanced and dynamic space.
- Minimalist furniture: Place the plant against modern, minimalist furniture like a sleek sofa or a glass coffee table to draw attention to the plant’s natural beauty.
- Industrial vibe: For a more industrial look, place your elephant ear in a metal pot or pair it with furniture that has a raw, unfinished appearance.
10. Play with Height and Size
Elephant ear plants come in different varieties, some of which grow quite large, while others stay smaller. Use this to your advantage to create depth and dimension in your décor.
- Large varieties: The larger the elephant ear plant, the more dramatic it will look in the room. Use it as a centerpiece for bigger spaces like living rooms and foyers.
- Smaller varieties: Smaller elephant ear plants work well in smaller spaces such as bathrooms, bedrooms, or even as accent plants on shelves or side tables.
Conclusion
Decorating with indoor elephant ear plants is all about making a bold statement while incorporating natural beauty into your space. By considering their size, placement, and pairing them with complementary décor, you can create a lush, tropical environment in any room. Whether you’re looking to fill an empty corner, enhance your living room, or add height to your décor, these stunning plants are perfect for creating a vibrant, nature-inspired atmosphere.
FAQs
- What are the light requirements for indoor elephant ear plants?
Bright, indirect sunlight is ideal. Too much direct light can scorch the leaves. - How can I prevent my elephant ear plant from wilting?
Ensure consistent watering and maintain adequate humidity levels. - What should I do if my plant develops brown tips?
Brown tips usually indicate low humidity. Mist the leaves or use a humidifier. - Can I grow elephant ear plants in low-light conditions?
They can tolerate low light but may not thrive as they would in brighter conditions. - How often should I repot my elephant ear plant?
Repot every 1-2 years or when the plant outgrows its pot.