
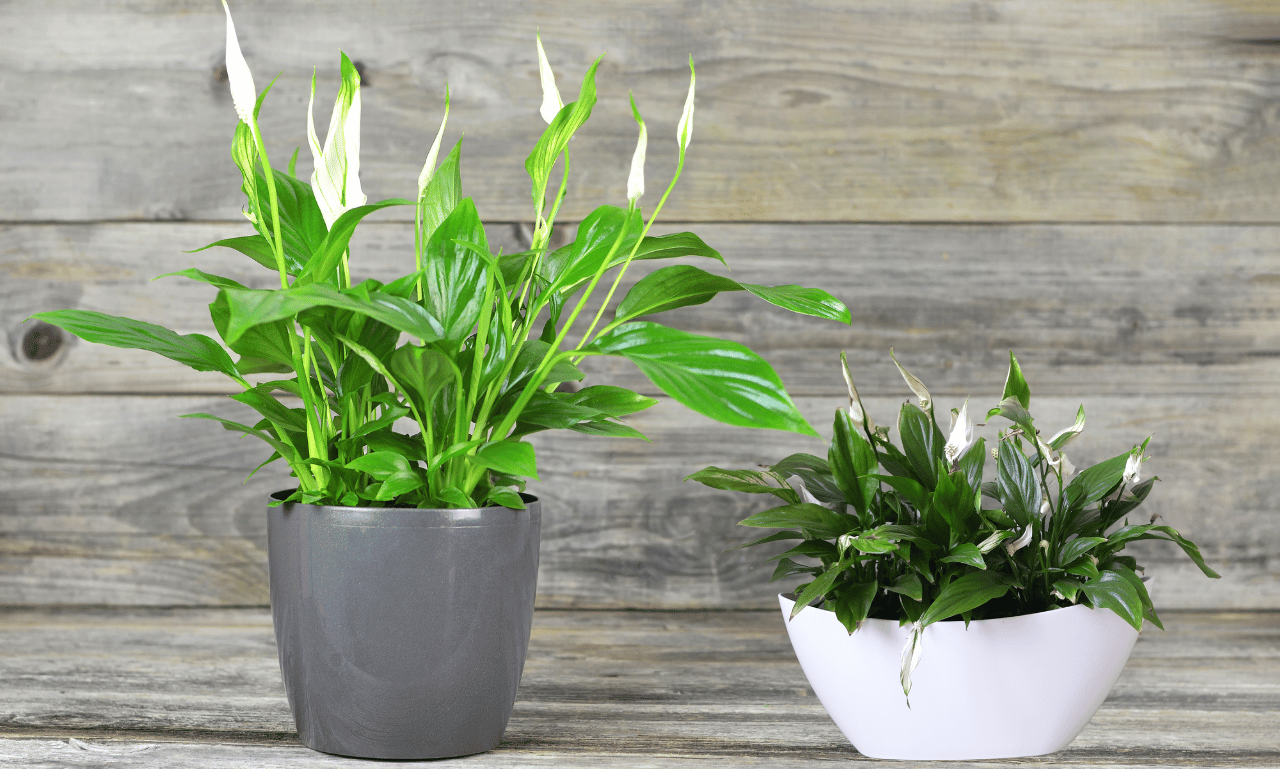
Peace Lilies (Spathiphyllum) are among the most loved houseplants for good reason. They’re low-maintenance, visually elegant, and incredibly forgiving. With their dark green leaves and graceful white blooms (which are actually modified leaves called spathes), they add a calming presence to any space. Native to the tropical rainforests of Central and South America, Peace Lilies thrive in the warm, humid environments of the jungle — and luckily, they adapt well to indoor conditions, too.
These plants are known for their air-purifying properties, according to NASA’s Clean Air Study. They help remove toxins like benzene, formaldehyde, and carbon monoxide from indoor spaces. But while Peace Lilies are fairly easy to care for, they still need the right balance of water, light, and nutrients to thrive. Understanding their natural habitat gives us clues on how to best nurture them indoors.
In this guide, we’ll break down everything you need to know — from choosing the perfect spot in your home to repotting, fertilizing, and even propagating your plant. Whether you’re a beginner or a seasoned plant parent, you’ll walk away with everything needed to keep your Peace Lily looking fresh, vibrant, and flourishing year-round.
Why Peace Lilies Are a Popular Indoor Plant
What makes the Peace Lily a superstar among indoor plants? For starters, it’s incredibly easy to grow, making it perfect for beginners and those with busy lifestyles. Its aesthetic appeal is undeniable — those broad, glossy leaves and pristine white flowers bring a clean, serene look to any room. But there’s more to it than just looks.
Peace Lilies also offer real, tangible benefits. They’re known to improve indoor air quality by filtering harmful toxins, which is a big win if you’re looking to create a healthier home environment. These plants also help boost humidity levels, which can be beneficial in dry indoor settings and during winter when heaters are running nonstop.
Another reason for their popularity? They’re forgiving. If you forget to water them, they’ll droop dramatically as a reminder — but they bounce back quickly once watered. They’re also adaptable to low-light conditions, which is ideal for apartments or rooms without a lot of natural sunlight.
Overall, Peace Lilies check all the boxes: beautiful, beneficial, and beginner-friendly. Whether on a desktop, in a bedroom, or nestled in a bathroom corner, they bring life and energy to your space without demanding much in return.
Choosing the Right Spot for Your Peace Lily
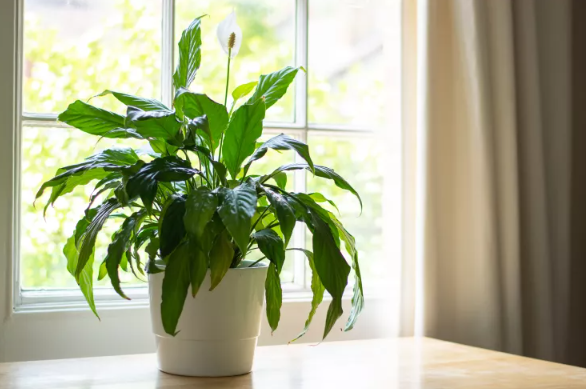
Placement is everything when it comes to Peace Lily care. This tropical beauty enjoys a well-lit spot, but it doesn’t like direct sunlight. Think of it like a vampire — a little brightness is fine, but too much sun can scorch its delicate leaves. Indirect, filtered light is ideal. North or east-facing windows are often the sweet spot.
Another key factor is avoiding drafts. Don’t place your Peace Lily near air vents, heaters, or windows that get chilly breezes in winter. Consistent temperatures keep your plant happier and healthier.
Bathrooms and kitchens can be great spots because of the higher humidity levels. If your Peace Lily’s leaves are turning brown or crispy, it might be too dry — and moving it to a more humid location could make all the difference.
Always remember: your Peace Lily will let you know if it’s unhappy. Yellowing leaves, brown tips, or wilting are all signs to adjust the environment. Finding the perfect spot may take a little trial and error, but once you get it right, your plant will thrive.
Importance of Indirect Light
Peace Lilies absolutely love bright but indirect light. If you place them in a spot where the sun hits directly, you’ll start noticing burnt leaf tips or scorched patches. It’s like leaving a piece of paper in the sun too long — it gets brittle and damaged.
Instead, aim for dappled light. If you can read a book in the area without turning on the lights, that’s likely the right brightness. Sheer curtains are your best friend if you have a south-facing window. They diffuse the light enough to protect your Peace Lily while still giving it the energy it needs to grow.
Interestingly, Peace Lilies can survive in low-light spaces, but they may not flower as often. If you’re hoping for those stunning white spathes, make sure your plant gets enough light. And if it’s not flowering? Move it a little closer to the window and watch what happens.
Best Locations in Your Home
Not sure where to put your Peace Lily? Let’s break it down room by room.
Living Room: Place it a few feet away from a bright window — east or north-facing ones are ideal. Avoid placing it right on a windowsill with direct rays pouring in. Use a plant stand or small table to elevate it for more visibility.
Bathroom: This is an often-overlooked spot, but it’s honestly a haven for tropical plants like Peace Lilies. The humidity from showers mimics their natural rainforest environment. Just make sure there’s at least some natural light, or supplement with a grow light.
Bedroom: A great place for a Peace Lily, especially since it purifies the air. Position it near a shaded window or corner that receives ambient daylight. Plus, it adds a touch of calming greenery — perfect for winding down.
Office/Desk: Got a cubicle or a home office? As long as there’s a window nearby, your Peace Lily will be content. If not, a small grow light will help.
Remember to rotate your plant every couple of weeks so it grows evenly. Like sunflowers, Peace Lilies tend to lean toward the light source. Turning them regularly keeps them balanced and beautiful.
Watering Your Peace Lily Properly
Here’s the golden rule with Peace Lilies: don’t overwater. These plants are far more likely to suffer from too much love (aka water) than not enough. A Peace Lily prefers to dry out slightly between waterings. When in doubt, wait a day or two.
A good routine is watering once a week, but adjust based on your environment. Warmer rooms or low-humidity homes might need watering more often, while cooler spaces require less. Always check the top inch of soil — if it’s dry, it’s time to water.
Use room-temperature water and water thoroughly until it drains from the bottom of the pot. Never let it sit in standing water. That’s a one-way ticket to root rot, and your plant will definitely not thank you for it.
Also, Peace Lilies are a bit dramatic — they droop when thirsty. Don’t panic! Give it a drink, and within hours it’ll perk right back up. It’s like plant magic.
How Often to Water
Frequency depends on multiple factors like pot size, room temperature, humidity, and the time of year. As a general guideline:
- Spring/Summer: Every 5–7 days. The plant is actively growing and needs more hydration.
- Fall/Winter: Every 10–14 days. Growth slows, and less water is needed.
Peace Lilies in smaller pots dry out faster than those in larger containers. If you use terra cotta pots, they wick moisture away from the soil, meaning more frequent watering is required compared to plastic or glazed pots.
Consistency is key. A good habit is checking the soil every weekend. Poke your finger an inch deep — if it feels dry, it’s watering time. If it’s moist, wait a few more days. Over time, you’ll get a feel for your plant’s needs.
Signs of Overwatering or Underwatering
Overwatering signs:
- Yellowing leaves
- Mushy stems or roots
- Foul odor from the soil
- Drooping despite moist soil
Underwatering signs:
- Dramatic wilting
- Crispy or browning leaf tips
- Dry, compacted soil pulling away from the pot’s edge
If you suspect overwatering, let the soil dry out before watering again. You might also need to remove the plant and check the roots for rot (they’ll appear brown and mushy). Underwatering is easier to fix — just give your plant a good drink and it’ll usually bounce back.
In both cases, reassess your routine and environment. A Peace Lily will thrive with just the right moisture balance — not too wet, not too dry. Kind of like Goldilocks.
Soil and Potting Mix for Peace Lilies
Soil is the foundation of your Peace Lily’s health, so let’s get it right. These plants like a light, well-draining soil that holds moisture but doesn’t stay soggy. A basic houseplant mix works fine, but you can improve it by adding perlite, peat moss, or coconut coir.
Avoid garden soil or heavy, compact mixes — they retain too much water and can suffocate the roots. You want the soil to breathe and allow excess water to drain out freely.
Here’s a simple DIY mix:
- 2 parts peat moss or coco coir
- 1 part perlite or pumice
- 1 part potting soil
This blend mimics the Peace Lily’s natural rainforest floor environment: moist, airy, and rich in organic matter.
Importance of Drainage
If your pot doesn’t have drainage holes, your Peace Lily is living on the edge — and not in a good way. Good drainage is critical to prevent root rot, which is one of the fastest ways to kill your plant.
Always choose pots with drainage holes. If your decorative pot doesn’t have one, use a nursery pot inside and pull it out when watering.
Use a saucer or tray to catch excess water, but make sure to empty it after 15–30 minutes. Letting your plant sit in water is like making it wear soggy socks all day — gross and harmful.
Also, never press the soil down too tightly when repotting. Loose soil helps with airflow and drainage, which your Peace Lily’s roots will thank you for.
Fertilizing Your Peace Lily
Peace Lilies aren’t heavy feeders, but giving them the right nutrients at the right time will encourage vibrant green leaves and beautiful blooms. The key? Feed moderately and only during the growing season.
From spring through early autumn, use a balanced, water-soluble houseplant fertilizer (like 10-10-10 or 20-20-20) once a month. Always dilute the fertilizer to half the recommended strength — Peace Lilies are sensitive to excess salts, which can burn their roots and cause brown leaf tips.
During fall and winter, stop fertilizing. Your plant is resting and doesn’t need the extra nutrients.
Signs your Peace Lily needs fertilizer include:
- Fewer or no blooms
- Pale, yellowing leaves
- Slower growth
But don’t rush to fertilize at the first sign of stress — it’s best to check if light, water, or soil conditions might be off before adding more nutrients.
Also, flush the soil every couple of months by running water through the pot for a few minutes. This helps remove any built-up salts from fertilizers.
When done right, fertilizing keeps your Peace Lily lush and happy without overwhelming its roots.
Humidity and Temperature Needs
As tropical plants, Peace Lilies love warmth and humidity. To mimic their natural habitat, keep your indoor temperature between 18°C to 27°C (65°F to 80°F) and humidity around 40–60%.
Avoid placing your Peace Lily near cold drafts, heating vents, or air conditioners. Sudden changes in temperature can stress the plant and cause drooping or yellowing leaves.
Tips for maintaining humidity:
- Group plants together (they release moisture into the air)
- Use a pebble tray with water beneath the pot (but not touching the base)
- Mist the leaves regularly with a spray bottle
- Use a room humidifier
In dry climates or during winter months when indoor air gets dry, a little humidity boost can make a huge difference in your plant’s appearance and health.
If you notice brown edges or tips, especially in colder seasons, low humidity is often the culprit.
Your Peace Lily will let you know it’s happy — vibrant leaves and occasional blooms are a good sign your environment is working.
Pruning and Maintenance
Peace Lilies are low-maintenance, but regular pruning helps them stay neat and encourages new growth. Use clean, sharp scissors or pruning shears to cut away yellow, brown, or wilted leaves. Always trim at the base of the plant, close to the soil line.
If your Peace Lily produces faded or spent flowers, snip the entire flower stalk back to the base. This prevents the plant from wasting energy on seed production and encourages it to bloom again.
Keep an eye on:
- Dusty leaves — gently wipe with a damp cloth or give your plant a gentle shower
- Pest infestations — inspect weekly for spider mites or mealybugs
- Drooping or sad-looking leaves — often a watering issue
Also, rotate your plant occasionally to ensure even growth and avoid a lopsided look. Peace Lilies tend to lean toward their light source, so a little turn every week helps them grow more symmetrically.
Pruning isn’t just about aesthetics — it helps your Peace Lily focus on healthy, vibrant foliage. Think of it as a haircut that promotes confidence (and better plant vibes).
Repotting Peace Lilies
Peace Lilies like being a little root-bound, but once the roots start circling the pot or poking out of the drainage holes, it’s time to repot. This usually happens every 12 to 18 months.
How to repot:
- Choose a pot 1–2 inches larger in diameter than the current one, with good drainage.
- Use a fresh, well-draining potting mix (see the soil section above).
- Gently remove the plant from its pot, loosen the root ball, and snip away any dead or mushy roots.
- Place the plant in the new pot, fill in with fresh soil, and water thoroughly.
Propagating Peace Lily
Growing your own Peace Lilies from a mature plant is a rewarding experience — and surprisingly easy! While these beauties don’t grow from seeds in household conditions, they’re incredibly simple to propagate through division. It’s a great way to multiply your collection or share the joy of Peace Lilies with friends and family.
When your Peace Lily becomes too large or starts to outgrow its pot, it’s the perfect time to propagate. You’ll likely notice multiple “crowns” or clumps forming in the same pot — each one can potentially become a new plant. Propagation is best done during spring or early summer when the plant is in its active growing phase.
Not only does division give you more plants, but it also rejuvenates the original one by giving its roots more space. Let’s break down the exact steps in the next section.
Division Method Explained
Here’s how to propagate your Peace Lily through division:
Step-by-Step Guide:
- Remove the Plant – Carefully take the Peace Lily out of its pot. You may need to squeeze the sides or use a butter knife to loosen the edges.
- Inspect the Roots – Shake off or gently rinse away excess soil so you can clearly see the root system. Look for natural separations or clusters.
- Divide the Plant – Using your hands or a clean, sharp knife, divide the root ball into smaller sections. Each section should have at least 3–5 healthy leaves and an established root system.
- Repot the Divisions – Place each new section in its own pot filled with fresh potting mix. Gently pat down the soil and water thoroughly.
- Provide Recovery Time – Keep the new plants in indirect light and maintain consistent moisture while they establish themselves.
Expect some drooping at first — this is completely normal after division. With proper care, they’ll perk up within a week or two. Before you know it, you’ll have multiple thriving Peace Lilies beautifying your space!
Peace Lily and Pet Safety
If you’re a pet parent, you’ve likely asked: Are Peace Lilies safe for cats or dogs? The answer is a cautious no.
Peace Lilies contain calcium oxalate crystals, which can be harmful if ingested by pets. While they’re not as dangerous as true lilies (which can be fatal to cats), chewing on the leaves or stems may lead to:
- Mouth irritation
- Drooling
- Vomiting
- Difficulty swallowing
The effects are generally not life-threatening but can still be unpleasant for your furry friend.
To keep pets safe:
- Place your Peace Lily on a high shelf or hanging planter
- Train pets to avoid houseplants
- Consider safer alternatives like spider plants or calatheas if your pets are especially curious
If you suspect your pet has chewed on a Peace Lily, call your vet or a pet poison hotline. Better safe than sorry!
So, while Peace Lilies are amazing indoor companions, always keep pet safety in mind when placing them in your home.
Seasonal Care for Peace Lilies
Like most plants, your Peace Lily has changing needs throughout the year. Adjusting your care routine seasonally ensures your plant stays happy and healthy no matter the season.
Spring/Summer:
- This is peak growing season!
- Water more frequently (but still check the soil first)
- Fertilize monthly with diluted houseplant fertilizer
- Repot or propagate if needed
- Provide bright, indirect light
Autumn:
- Growth slows down
- Begin reducing watering frequency
- Stop fertilizing by late fall
- Maintain good airflow and avoid cold windows
Winter:
- Peace Lilies go semi-dormant
- Only water when the top inch of soil is dry
- Keep humidity levels up (they dry out quickly in heated rooms)
- No fertilizing — let the plant rest
- Keep the plant away from chilly drafts
By tweaking your care a little each season, you can prevent stress and maintain a strong, happy Peace Lily year-round.
Benefits of Growing Peace Lilies
Peace Lilies don’t just look great — they’re packed with benefits that make them one of the best houseplants for beginners and seasoned plant parents alike.
1. Air Purification:
NASA studies have shown Peace Lilies can filter out indoor air pollutants like formaldehyde, benzene, and carbon monoxide. Think of them as natural air purifiers — without the electricity bill!
2. Low Maintenance:
They’re forgiving if you forget to water occasionally and will let you know when they’re thirsty by drooping. Bounce-back champions!
3. Aesthetically Pleasing:
Those glossy green leaves and white hooded flowers are a timeless, classy addition to any space. Whether it’s a living room, office, or bathroom, Peace Lilies bring elegance effortlessly.
4. Boosts Mental Wellness:
Taking care of plants can reduce stress, improve focus, and even boost your mood. A Peace Lily on your desk or beside your bed is like having a quiet little cheerleader around.
5. Natural Humidifier:
By releasing moisture through their leaves, Peace Lilies help increase humidity — great for your skin, breathing, and even other nearby plants.
In short, Peace Lilies don’t just decorate — they contribute to your environment and well-being.
Conclusion
Caring for a Peace Lily is like having a peaceful relationship — it thrives with love, consistency, and a bit of attention. Whether you’re new to plants or a seasoned green thumb, this plant offers beauty, benefits, and a forgiving nature.
By understanding your Peace Lily’s preferences — from lighting to watering, repotting to propagation — you’re setting it up for a long, lush life. Don’t be afraid to get your hands dirty, experiment with placement, or even talk to your plant (hey, it works for some of us!).
With these tips, you’re now ready to give your Peace Lily the care it deserves and watch it thrive.
FAQs
1. Why are the tips of my Peace Lily turning brown?
Brown tips usually indicate over-fertilizing, low humidity, or chlorine in tap water. Try using filtered water and misting regularly to improve humidity.
2. How often should I water my Peace Lily?
Water when the top inch of soil is dry. On average, once a week — but more during summer and less in winter.
3. Can Peace Lilies grow in water alone?
Yes! You can grow them hydroponically with just water and a few drops of liquid fertilizer. Just make sure to change the water weekly.
4. Why isn’t my Peace Lily blooming?
Lack of flowers can result from low light, infrequent feeding, or being root-bound. Brighten up its location and consider repotting.
5. Is Peace Lily good for bedrooms?
Absolutely! It purifies air, adds calm vibes, and tolerates low light — making it perfect for bedrooms.