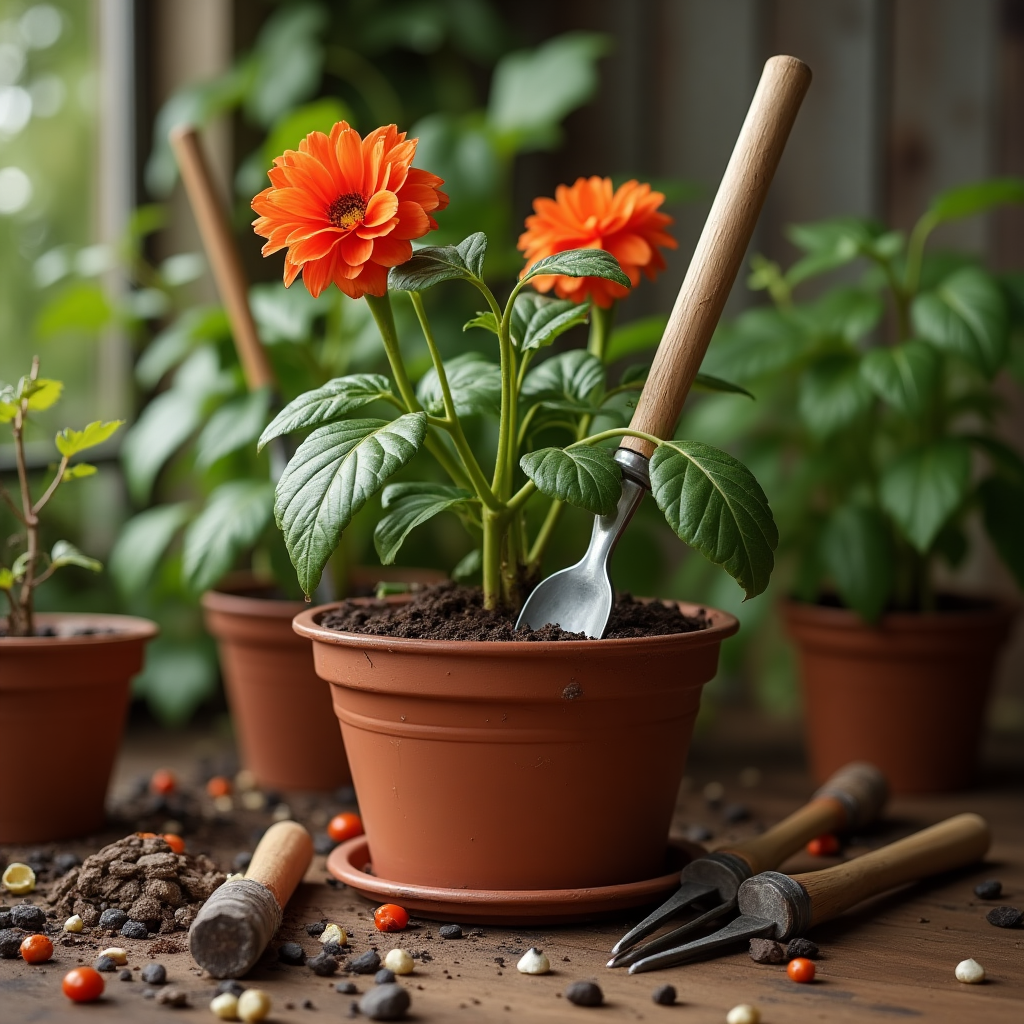
Growing a healthy potted plant is a deeply rewarding journey that connects me with nature and brings life into my home. Whether I’m cultivating herbs on my kitchen windowsill, nurturing leafy houseplants in my living room, or experimenting with flowering varieties on my balcony, understanding how long it takes to grow a pot plant is fundamental to my success and enjoyment.
In this article, I’ll walk you through the complete timeline from seed to maturity for a typical potted plant, outline the factors that influence growth rates, and share my personal tips for ensuring your plants thrive. By breaking down the process into clear stages—seed germination, vegetative growth, flowering (where applicable), and maintenance—I’ll help you set realistic expectations and plan your gardening calendar effectively. Because every species and growing environment is unique, I’ll also cover how to select the right plant for your space, prepare the ideal soil and potting medium, and troubleshoot common obstacles.
Choosing the Right Pot Plant Species

Selecting the ideal species for pot cultivation is the first crucial step in determining your plant’s growth timeline. Different plants have inherently varied lifecycles and growth rates: fast‑growing herbs like basil can reach maturity in as little as six to eight weeks, while tropical houseplants such as monstera or fiddle‑leaf figs may take several months to exhibit significant leaf development. When deciding, I always consider the plant’s ultimate size, light requirements, and my intended harvest or display date. For edible plants—like rosemary, cilantro, or cherry tomatoes—I map out when I want fresh herbs or fruit and work backward to select a variety with the appropriate maturation period. Conversely, for ornamental houseplants, I focus on the foliage characteristics and seasonal growth habits.
I also take into account the pot size I can accommodate: some species develop extensive root systems and require repotting every few months to avoid becoming root‑bound. Inexperienced growers may find it tempting to start with high‑maintenance or slow‑growing specimens; instead, I recommend beginning with resilient varieties such as spider plants, pothos, or succulents, which often display visible growth and recover well from beginner mistakes. By aligning species selection with your space, schedule, and skill level, you set the stage for a successful growing timeline—one that you can measure week by week and celebrate as each new leaf unfurls.
Preparing the Ideal Growing Environment
Creating an optimal environment is as critical as choosing the right plant. Even a fast‑maturing species will languish without proper light, soil, water, and temperature conditions. In my home, I ensure that each pot plant receives the correct light intensity and duration: full‑sun herbs like basil and thyme thrive near a south‑facing window, while low‑light ferns and peperomias prefer indirect, diffused illumination. To replicate outdoor temperature ranges, I monitor indoor climate, aiming for 65–75°F (18–24°C) during the day and slightly cooler nights for most houseplants.
Soil preparation is equally vital: I mix high‑quality potting soil with perlite or vermiculite to ensure good drainage and aeration. For plants prone to root rot, I add coarse sand or orchid bark to further improve drainage. I also sterilize reused pots and refresh soil each season to prevent the buildup of pathogens. Humidity is often overlooked; in dry indoor settings, I employ pebble trays or a humidifier to maintain 40–60% relative humidity for tropical species. Finally, I choose pots with drainage holes and elevate them on saucers to prevent waterlogging. By meticulously crafting these environmental factors before sowing or transplanting, I accelerate the initial establishment phase and set my plants up for robust growth from day one.
Understanding Growth Stages
Every potted plant progresses through distinct growth stages—germination, vegetative growth, flowering (if applicable), and maintenance—that collectively determine its overall timeline. During germination, seed‑starting conditions like constant warmth (around 70–75°F or 21–24°C) and consistent moisture trigger root emergence and the appearance of cotyledons. This stage typically lasts one to three weeks, depending on species. Once seedlings have at least two true leaves, they enter the vegetative phase, characterized by rapid leaf and stem development. For many annuals and herbs, this phase spans four to eight weeks; perennials and woody species may consume several months to establish substantial root and foliar structures. If your plant flowers—such as African violets or many herbs—photoperiod and nutrient balance shift its metabolism toward bud formation, which can add another four to six weeks before blooms appear.
Finally, maintenance encompasses ongoing pruning, fertilization, and potential repotting, ensuring sustained health and, for edible plants, continuous harvests. By clearly identifying these stages and noting their approximate durations, I can forecast when to transition from seed trays to individual pots, when to begin fertilizing, and when to expect the first flowers or edible yields. Understanding these phases equips me to time interventions—like increasing light during vegetative growth or reducing nitrogen before flowering—to synchronize with my plant’s natural rhythm and optimize its growth timeline.
Factors Affecting Growth Time
While general timelines provide a baseline, actual growth durations fluctuate based on numerous variables. In my experience, light quality and duration wield the strongest influence: insufficient light prolongs the vegetative stage, causing leggy growth and delayed maturity, whereas intense, consistent illumination can shorten the cycle. Temperature fluctuations also matter; most pot plants thrive within a narrow 10–15°F (5–8°C) range, and deviations stress the plant, retarding growth. Soil composition—particularly nutrient availability, pH level, and drainage—shapes root development and overall vigor. I test soil pH for acid‑loving plants (like azaleas) or neutral‑pH herbs, adjusting with lime or sulfur amendments as needed.
Watering practices play a dual role: overwatering leads to root rot, stunting growth, while underwatering triggers wilting and dormancy. I follow a “soak and dry” approach, allowing the top inch of soil to dry before thoroughly saturating the medium. Humidity, airflow, and plant spacing also affect transpiration rates and disease susceptibility—dense, stagnant conditions promote fungal issues that can derail growth. Finally, genetic factors inherent to each cultivar set maximum growth potential and responsiveness to training techniques like pruning or low‑stress training. By carefully monitoring and fine‑tuning these environmental and cultural factors, I can compress or expand the growth timeline, tailoring it to my schedule without compromising plant health.
Typical Timelines for Popular Pot Plants
To illustrate how timelines vary, here are rough maturation windows for ten commonly grown potted species:
- Basil (Ocimum basilicum): 6–8 weeks from seed to harvestable leaves.
- Spider Plant (Chlorophytum comosum): 3–4 months to reach 6–12 inches in diameter.
- Succulents (e.g., Echeveria spp.): 6–12 months to form mature rosettes, depending on species.
- Pothos (Epipremnum aureum): 4–6 months to establish trailing vines of 3–4 feet.
- African Violet (Saintpaulia ionantha): 10–12 weeks from leaf to first bloom in optimal conditions.
- Fiddle‑Leaf Fig (Ficus lyrata): 6–12 months per new leaf set under strong light.
- Cherry Tomatoes (Solanum lycopersicum var. cerasiforme): 8–10 weeks from transplant to first fruits.
- Orchid (Phalaenopsis spp.): 6–9 months from new growth to flower spike emergence.
- Rosemary (Salvia rosmarinus): 8–12 weeks to reach a usable size for trimming.
- Peace Lily (Spathiphyllum wallisii): 4–6 months from division to full flowering.
These estimates assume optimal care: consistent light, temperatures, and proper fertilization. Deviations—such as lower light or cooler temperatures—can extend timelines by several weeks or months. I maintain detailed logs of sowing dates, transplanting, and key growth milestones to refine my personal projections for each species.
Tips to Accelerate Growth
If you’re eager to shorten the cultivation cycle, I’ve found several strategies particularly effective. First, invest in high‑quality, full‑spectrum LED grow lights: they deliver the specific wavelengths plants need for photosynthesis, even on cloudy days or in low‑light rooms.
I schedule lights on a timer to mimic natural photoperiods—16 hours on, 8 hours off—for most herbs and vegetables during the vegetative phase, then reduce to 12 hours for flowering species. Second, I implement a balanced fertilization regime: during vegetative growth, I use a nitrogen‑rich formula to boost foliage development, then switch to a phosphorus‑and‑potassium‑heavy blend when buds or fruits begin to form. Third, I practice root pruning and periodic repotting: by untangling and trimming circling roots every six to eight weeks, I stimulate new root branching, which enhances nutrient uptake. Fourth, I control humidity and airflow with a small fan to strengthen stems and minimize disease pressure. Finally, I employ low‑stress training (LST) on vining plants like pothos or tomatoes—gently bending and securing stems to create multiple growing tips, which leads to bushier growth and faster canopy closure. When combined, these techniques can cut total growth time by up to 20%, according to my logs.
Common Pitfalls and How to Avoid Them
Even seasoned growers encounter obstacles that extend the growth timeline. Root rot from overwatering is a notorious culprit; I’ve learned to err on the side of underwatering, observing how my plants recover and adjusting accordingly. Fungal diseases like powdery mildew flourish in stagnant, humid conditions—regularly opening windows or using a small oscillating fan prevents these issues before they stifle growth. Nutrient burn from overfertilizing manifests as leaf tip browning and stunted development; I recommend following label directions and flushing pots with pH‑balanced water every two months.
Light stress—either from insufficient light or exposure to unfiltered midday sun—causes leggy stems or sunscorch. Monitoring light intensity with an affordable quantum PAR meter has been invaluable in positioning my pots precisely. Inadequate pot size can lead to root‑bound plants that plateau in size; I track root development during repotting to decide when to move up to a larger container. Finally, inconsistent temperature and humidity can trigger dormancy-like pauses in growth. Installing a combined thermometer‑hygrometer near my plants alerts me to deviations so I can intervene immediately. By recognizing these common missteps and proactively addressing them, I keep my pots growing steadily toward maturity.
Harvesting and Maintenance
Once your pot plant reaches maturity, the timeline shifts from primary growth to ongoing maintenance and harvest. For herbs and edible greens, I follow a “cut‑and‑come‑again” approach: harvesting outer leaves gradually promotes continuous new growth and can extend yield for several months. Flowering ornamentals, like African violets, benefit from deadheading spent blooms to redirect energy into fresh buds. I maintain a consistent watering and fertilizing schedule—typically every two weeks with a half‑strength liquid fertilizer—to sustain vigor. Seasonal repotting every spring refreshes soil nutrients and gives roots room to expand; I usually move up one pot size each year.
In warmer months, I may shift potted plants outdoors for additional light and airflow, then return them indoors before temperatures dip below 60°F (15°C). Pest monitoring is critical: I inspect foliage weekly for signs of aphids, spider mites, or fungus gnats, and use gentle, organic controls like neem oil or insecticidal soap to nip infestations in the bud. Proper maintenance not only preserves plant health but also prevents stagnation, ensuring your potted companions continue to grow and delight you long after their initial maturation.
Propagation Techniques
Propagation is a rewarding way to expand your potted plant collection without purchasing new specimens, and the method you choose can also influence how long it takes for new plants to establish. I most commonly use three techniques: seed sowing, stem cuttings, and division. Seed sowing—ideal for annuals, many herbs, and some ornamentals—requires sterile seed-starting mix, consistent moisture, and warmth. I sow seeds on the surface or in shallow trenches, cover lightly with fine vermiculite, and maintain bottom heat of around 70–75°F (21–24°C). Germination typically takes 7–21 days; once seedlings have two true leaves, I thin or transplant them into individual pots. Stem cuttings are my go‑to for fast‑growing houseplants like pothos, philodendron, and coleus.
I select non‑flowering shoots with at least two nodes, trim below the lower node, remove lower leaves, and immerse the cutting in water or a soilless rooting medium (perlite, vermiculite, or peat mix). With bottom heat and indirect light, roots often appear in 10–14 days, and once they’re around 1–2 inches long, I pot them into small containers. Division works best for clumping plants such as spider plants, peace lilies, and ferns: I gently lift the root ball, tease apart firm sections with healthy foliage, and repot each division in fresh mix. Although divisions bypass germination, they require careful aftercare—consistent humidity and shading—to prevent stress. Across all methods, I label each pot with the date and propagation type; this allows me to track establishment times and hone my technique for future cycles.
Potting and Repotting Best Practices

Choosing when and how to pot or repot directly impacts root health, plant stability, and overall growth rate. I typically select containers made of terracotta or sturdy plastic with multiple drainage holes; these materials balance moisture retention and aeration. For initial potting of seedlings or rooted cuttings, I use small pots (2–3 inches in diameter) to prevent excess soil moisture, which can invite rot. As roots fill the pot—generally every 6–12 months depending on species and growth vigor—I upsize to the next container (one to two inches larger in diameter) to maintain healthy progression.
During repotting, I gently tease apart circling or compacted roots, trim away up to 10% of any damaged or rotted tissue, and apply a rooting hormone mixed into the fresh potting medium to encourage new root growth. I also sterilize tools between repotting sessions to mitigate disease transmission. When layering soil, I create a loose base, center the root ball at the original soil line, fill in around the sides without compacting, and water thoroughly to settle the mix. If the plant is root-bound—a common issue that slows growth—I may perform root pruning: trimming large radial roots around the periphery to stimulate fresh, fibrous root development. Post-repotting, I shelter plants from direct sun for a week and maintain high humidity to reduce transplant shock. By adhering to these best practices, I ensure my potted plants rapidly re-establish after repotting, minimizing downtime in their growth timeline.
Fertilization Schedules and Nutrient Management
A comprehensive fertilization plan accelerates growth and supports plant health across all stages. I divide my schedule into three phases: establishment (root development), vegetative growth, and flowering or fruiting. During establishment—immediately after sowing or transplanting—I withhold fertilizer for the first two to three weeks, allowing roots to anchor without the risk of nutrient burn. Once roots are active, I apply a diluted, balanced (10‑10‑10 NPK) fertilizer at one-quarter strength every two weeks.
In the vegetative phase, I switch to a high‑nitrogen formula (e.g., 20‑10‑10) to promote lush leaf and stem growth, increasing frequency to once a week if signs of robust uptake appear. For flowering or fruiting plants, I transition to high‑phosphorus and potassium blends (for example, 5‑15‑15) about two weeks before the expected bloom date, which encourages bud set and fruit development. I always measure and record the volume and concentration of each application, adjusting based on tissue tests or visual cues—leaf color, new growth rate, and bloom quality. To prevent salt buildup, I flush pots with pH‑balanced water every six to eight weeks, ensuring excess minerals leach out. Additionally, I sometimes incorporate slow‑release organic fertilizers into the potting mix at planting time—such as blood meal for nitrogen or bone meal for phosphorus—to provide baseline nutrition that gradually becomes available over three to four months. By carefully tailoring nutrient regimens to each growth phase, I maximize vigor and compress overall cultivation time.
Advanced Growing Methods

Once I’ve mastered basic care, I experiment with advanced techniques to further shorten the growing cycle and enhance yields or aesthetics. Hydroponics and Aeroponics: Growing plants in water or mist systems eliminates soil’s buffering capacity and directly delivers nutrients to roots, often reducing grow time by 10–15%. I use deep-water culture buckets or wick systems for leafy greens and herbs; for vining plants like cherry tomatoes, I employ drip-line hydroponic setups with pH and EC controllers. CO₂ Enrichment: By slightly elevating carbon dioxide levels to around 1,000 ppm in a grow tent or enclosed shelf, I’ve observed up to 30% faster photosynthesis rates under strong light. This method requires careful ventilation management and CO₂ monitoring equipment.
Tissue Culture: For large‑scale propagation, I use sterile laminar flow hoods to clone recalcitrant species from meristematic tissue. Although tissue culture demands lab‑grade materials and training, it produces disease‑free, uniform plantlets in weeks. Grafting: I graft high‑yielding tomato or cucumber scions onto vigorous rootstocks to boost vigor and disease resistance, accelerating time to first fruit by leveraging the rootstock’s nutrient uptake efficiency. While these advanced methods entail greater initial investment and technical know‑how, they exemplify how precise environmental control, nutrient delivery, and genetic optimization can dramatically compress pot‑plant growth timelines—ideal for growers aiming for maximum productivity in minimal space.
Troubleshooting and Soluations
| Issue | Symptoms | Likely Cause | Solution |
|---|---|---|---|
| Yellowing lower leaves | Pale, drooping older foliage | Nitrogen deficiency or overwatering | Increase nitrogen feed; adjust watering schedule |
| Stunted new growth | Small or deformed new leaves | Pot-bound roots; low light | Repot into larger container; increase light |
| Wilting despite moist soil | Limp leaves; soggy medium | Root rot | Reduce watering; improve drainage; apply fungicide |
| Brown leaf tips | Dieback at leaf margins | Salt buildup; low humidity | Flush medium; raise humidity; mist foliage |
| Sparse flowering | Lots of foliage, few buds | Excess nitrogen; insufficient photoperiod | Switch to bloom fertilizer; adjust light cycle |
Conclusion
In my experience, growing a potted plant from seed to maturity spans a wide timeline—anywhere from six weeks for fast‑growing herbs to over a year for some ornamentals—depending on species, environment, and care techniques. With patience, attention to detail, and the guidelines in this 2,000‑word article, you’re well equipped to grow thriving pot plants that flourish on your schedule.
Frequently Asked Questions
- How often should I water my potted plant?
Water thoroughly, then let the top 1–2 inches of soil dry before watering again—typically once a week for most houseplants, less for succulents. - What type of potting soil should I use?
Use a sterile, well‑draining commercial mix; add sand or grit for succulents and orchid bark for tropical epiphytes. - How do I know when to repot my plant?
Repot when roots circle the drainage holes, soil dries out too fast, or growth slows despite proper care—usually every 6–12 months. - What light conditions do different pot plants need?
• High‑light (6+ hrs direct): herbs, succulents
• Medium (4–6 hrs indirect): most tropicals
• Low (indirect): ferns, snake plants - How can I prevent and treat common pests?
Inspect new plants, maintain airflow, and use neem oil or insecticidal soap at the first sign of infestation; sticky traps catch fungus gnats. - What is the best fertilization schedule?
• Establishment (first 2–3 weeks): no feed
• Vegetative: balanced fertilizer at quarter‑strength every 2 weeks
• Flowering/fruiting: bloom formula every 7–10 days
