Are you looking to infuse a burst of nature into your home but short on floor space?DIY wall planters are innovative garden projects that allow you to attach small planters or pockets to your walls. Whether it’s for a balcony, kitchen, or living room, these planters let you grow herbs, succulents, or decorative greenery without the need for a large garden or traditional planter boxes. Think of them as living art that transforms bare walls into lush, vibrant displays. DIY wall planters offer a brilliant solution to bring life, color, and a touch of creativity into your living spaces. In this article, we’ll explore everything you need to know about creating your own wall planters—from planning and design to installation and maintenance.
What Are DIY Wall Planters?
DIY wall planters are innovative, hands-on projects that transform vertical spaces into living gardens. These planters, crafted by repurposing materials like reclaimed wood, metal, or recycled containers, allow you to create a unique display for your favorite plants. Perfect for small spaces or urban environments, DIY wall planters not only save floor space but also add a touch of nature and creativity to your decor. They encourage sustainable living and are customizable to your style, making them both practical and aesthetically pleasing.
Benefits of DIY Wall Planters

DIY wall planters are a creative and efficient way to infuse nature into any space, especially where floor space is limited. They bring a host of benefits that enhance both the functionality and aesthetics of your living or working environment. Here are some of the key advantages:
- Space-Saving: Utilizing vertical surfaces means you can transform barren walls into lush, living displays, making them ideal for small apartments or offices.
- Customization: DIY projects let you tailor the design, colors, and layout to perfectly match your personal style and decor.
- Cost-Effective: By repurposing materials like reclaimed wood or recycled containers, you keep expenses low while promoting eco-friendly practices.
- Enhanced Aesthetics: A well-crafted wall planter adds a vibrant, organic touch to any room, turning plain walls into living art.
- Improved Air Quality: Adding greenery indoors helps purify the air, contributing to a healthier atmosphere.
- Easy Maintenance: Designed with practicality in mind, many DIY planters include features such as proper drainage for hassle-free upkeep.
- Creative Outlet: Building your own planter offers a fun, rewarding project that allows you to express your creativity and enjoy the process.
Planning Your DIY Wall Planter Project
Before diving into the project, it’s crucial to plan meticulously. Proper planning sets the foundation for a successful DIY wall planter project.Planning your DIY wall planter project is the crucial first step to ensuring a successful and stress-free build. Begin by evaluating the space where you intend to install your planter. Consider factors such as available sunlight, wall material, and the weight-bearing capacity of the surface. This helps determine the best type of plants to use and the design that will both complement your décor and thrive in the chosen location.
Next, outline your project by creating a detailed plan that includes a list of materials, tools, and estimated costs. Decide whether you’ll use reclaimed wood, recycled containers, or other sustainable materials. Sketch your design, noting the dimensions and placement of planters to ensure a balanced and attractive layout. Additionally, consider incorporating features like drainage holes and waterproof liners for practical maintenance.
Materials Needed
The beauty of DIY projects is that you can often use reclaimed or recycled materials. Common items include:
- Wooden planks, pallets, or reclaimed boards
- Planter boxes or recycled containers
- Waterproof liners or trays
- Screws, nails, and brackets
- Potting soil and your choice of plants
Tools Required
Gathering the right tools is essential. Consider having the following on hand:
- A power drill or screwdriver
- A saw (hand saw or circular saw)
- Measuring tape and a level
- Sandpaper for smoothing edges
- Paintbrushes and stencils for decoration
Budget Considerations
DIY projects can be as budget-friendly or extravagant as you desire. Outline your budget by considering:
- Cost of materials (if buying new items)
- Tools you might need to purchase or rent
- Decorative elements or finishes A clear budget can help you stay on track and avoid unnecessary expenses.
Design Inspiration for Wall Planters
When it comes to designing your DIY wall planter, the possibilities are endless. Here are some detailed points to spark your creativity:
- Modern and Minimalist Designs:
Embrace clean lines and simple geometric shapes. Use monochromatic color schemes or natural wood finishes to create a sleek, contemporary look. Minimalist designs work well in urban apartments and modern offices, where less is more. - Rustic and Vintage Styles:
Incorporate reclaimed wood, distressed metal, and weathered finishes to evoke a warm, nostalgic feel. Rustic designs are perfect for farmhouse or boho interiors, adding a touch of charm and character to your space. - Industrial Chic:
Combine raw materials like metal pipes, concrete, and exposed hardware for a bold, urban vibe. Industrial designs are ideal for lofts or modern living spaces, where the fusion of functionality and edgy aesthetics creates a statement piece. - Eco-Friendly and Sustainable Options:
Use recycled materials, upcycled containers, and biodegradable planters to promote sustainability. Earthy tones and natural textures can seamlessly blend with greenery, making your wall planter both stylish and environmentally conscious. - Artistic and Custom Painted Designs:
Let your imagination run wild with custom murals, stencils, or hand-painted patterns. This approach allows you to tailor the design to your personality, turning your wall planter into a unique piece of living art.
Assembling the Materials
With your plan in hand, it’s time to prepare your materials.
Cutting and Preparing Materials
Measure twice, cut once! Carefully measure your wooden boards or other materials to the desired dimensions. Use sandpaper to smooth any rough edges—this not only ensures safety but also gives your planters a polished look.
Assembling the Frame
Using your power drill or screwdriver, assemble the frame according to your design. Ensure that all pieces are securely fastened. If you’re using recycled containers as planters, make sure they’re properly attached and won’t easily detach from the frame.
Finishing Touches
Now comes the fun part—personalizing your planter!
Painting and Decoration
Select a color palette that compliments your home décor. A fresh coat of paint can instantly elevate the look of your wall planter. Don’t hesitate to add patterns, stencils, or even decals for a unique touch. This is where you truly make the design your own.
Installation and Mounting
Once your planter is complete, it’s time to mount it on the wall. Use a level to ensure that your planter hangs straight. Secure the frame with appropriate wall anchors or brackets to ensure it remains stable over time.
Creative Customization Ideas
- Use of Paints and Stencils:
• Experiment with bold colors, patterns, and stencils to give your wall planter a unique artistic touch.
• Layer different hues to add depth and create eye-catching designs. - Incorporate Natural Elements:
• Enhance the organic feel by integrating natural materials like small pebbles, driftwood, or decorative moss.
• Use these elements to complement the greenery and add texture. - Mix Materials:
• Combine reclaimed wood, metal accents, or even recycled glass for a dynamic, multi-textured look.
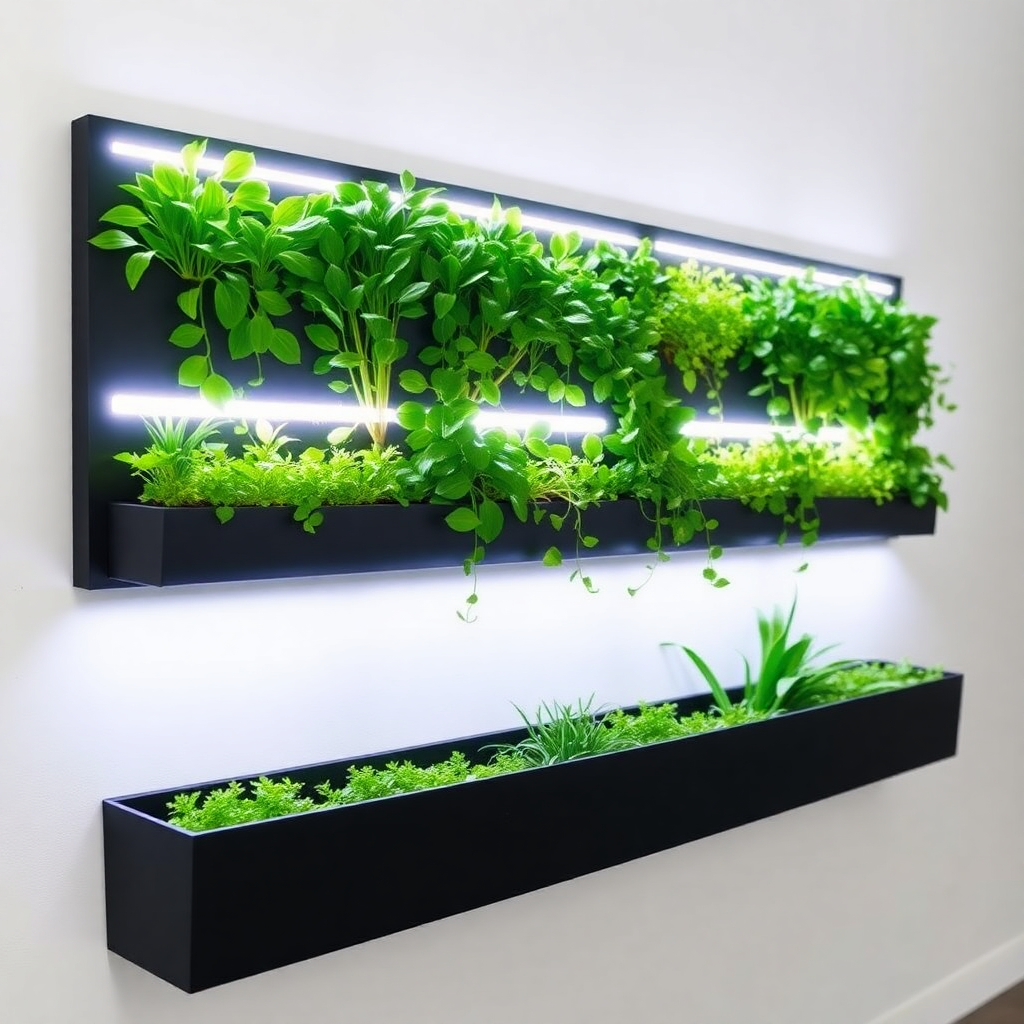
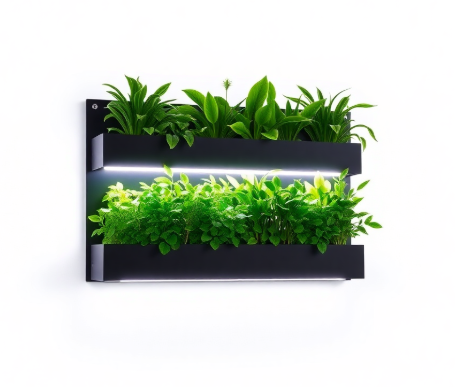
• This blend can create a striking contrast that suits various decor styles. - Add Lighting Effects:
• Integrate LED or solar-powered lights around or within your planter for a captivating glow at night.
• Lighting can highlight the planter’s features and add ambiance to your space. - Themed Designs:
• Personalize your planter by aligning it with a specific theme, such as rustic farmhouse, modern minimalism, or urban chic.
• Tailor elements like color, texture, and shape to match your chosen style. - Custom Labels and Signage:
• If you’re planting herbs or vegetables, create custom labels to identify each plant.
• This adds a practical and decorative element to your DIY project.
Maintenance and Care Tips
- Regular Cleaning:
• Dust and debris can accumulate over time. Use a soft brush or cloth to gently wipe the planter and its surfaces.
• For deeper cleaning, apply a mild soap solution without damaging the paint or finish. - Proper Watering:
• Check the soil moisture regularly and water only when the top inch feels dry.
• Ensure that drainage holes remain unobstructed to prevent waterlogging and root rot. - Inspect Structural Integrity:
• Periodically examine the planter for loose screws, weakened brackets, or signs of material wear.
• Tighten or reinforce any loose areas promptly to maintain stability. - Seasonal Adjustments:
• In winter, protect sensitive plants by moving them indoors or covering the planter with weather-resistant materials.
• In summer, provide additional water and consider adding shade to shield your plants from excessive heat. - Drainage Maintenance:
• Regularly check that drainage holes are clear and functioning to avoid water pooling.
• Replace or repair any damaged waterproof liners as needed.
Troubleshooting Common Issues
When creating DIY wall planters, you might encounter some challenges. Here are some common issues and tips on how to troubleshoot them:
- Structural Stability:
If your planter feels wobbly or unstable, double-check that all joints are securely fastened. Reinforce weak spots with additional brackets or screws, and consider adding extra support brackets to distribute weight more evenly. - Water Drainage Problems:
Pooling water can damage both the planter and your plants. Ensure that your design includes proper drainage holes and that a waterproof liner is installed. If water accumulates, adjust the angle of the planter to encourage natural runoff. - Material Deterioration:
Over time, weather exposure or excess moisture can lead to warping or rotting of materials. Use weather-resistant materials or apply a sealant or protective finish to prolong the lifespan of your planter. - Installation Challenges:
If your planter is difficult to mount, verify that you are using the correct wall anchors and hardware. Ensure the wall surface is clean and sturdy. If issues persist, consider redistributing the planter’s weight across multiple mounting points.
Conclusion
DIY wall planters are a fantastic way to blend functionality with creativity. Not only do they provide a unique means to incorporate nature into your home, but they also offer an opportunity to express your style. By planning carefully, choosing the right materials, and following a detailed step-by-step guide, you can create a stunning piece of living art that reflects your personality and enhances your space.
FAQs
Q1: Can I use recycled materials for my DIY wall planter?
Absolutely! Using recycled materials not only reduces waste but also adds a unique, rustic charm to your project. Many DIY enthusiasts opt for reclaimed wood and repurposed containers to create planters that tell a story.
Q2: What types of plants work best in wall planters?
Herbs, succulents, and small flowering plants work great in wall planters. Consider the light and humidity levels of your chosen location when selecting plants to ensure they thrive.
Q3: How do I ensure my wall planter is securely mounted?
Always use appropriate wall anchors and brackets that match the weight and design of your planter. It’s also a good idea to locate studs in your wall for additional support.
Q4: How often should I water plants in a wall planter?
Watering frequency depends on the types of plants and the local climate. Generally, check the moisture level of the soil regularly and water when the top inch feels dry. Proper drainage is also key to prevent overwatering.
Q5: Can I customize the design of my DIY wall planter?
Yes, one of the best aspects of DIY projects is the ability to customize. From different color schemes and patterns to adding natural elements, you can tailor your wall planter to perfectly fit your style and décor.