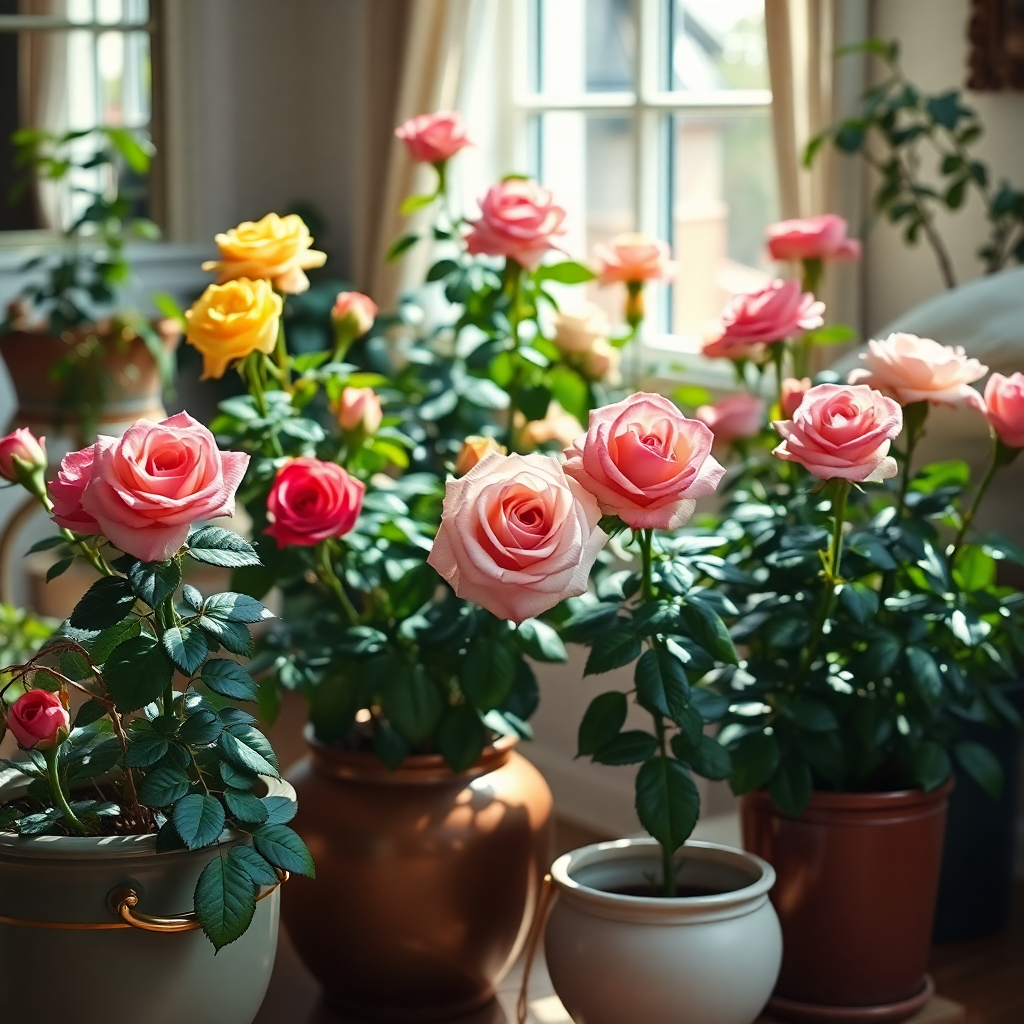
Roses are often associated with lush gardens and outdoor spaces, but did you know they can thrive indoors too? Growing roses indoors may seem challenging, but with the right care and environment, it’s entirely possible to enjoy these beautiful blooms in your home. Whether you’re a seasoned gardener or just starting,
this guide will walk you through the essentials of cultivating healthy, vibrant roses indoors. From selecting the perfect variety to providing the ideal light, water, and care, you’ll learn everything you need to know to create your own indoor rose haven.
Why grow roses indoors?

Growing roses indoors offers a unique opportunity to enjoy their beauty and fragrance year-round, regardless of the season. These stunning flowers can brighten up any interior space, bringing a touch of elegance and charm to your home. Indoor rose gardening is particularly beneficial for those living in urban areas or climates where outdoor gardening isn’t feasible.
Beyond their aesthetic appeal, indoor roses can also improve air quality and create a calming atmosphere. Caring for roses indoors allows gardeners to connect with nature, offering therapeutic benefits and a sense of accomplishment. Additionally, growing roses indoors protects them from outdoor pests and harsh weather conditions, ensuring healthier plants and vibrant blooms.
Whether placed in a sunny window or as a centerpiece, indoor roses are a versatile and rewarding addition to any home. They’re perfect for creating a personalized green space that adds life and luxury to your indoor environment.
Benefits of Growing Roses Indoors

Growing roses indoors offers numerous advantages, making it an appealing choice for plant enthusiasts. Here are the key benefits:
- Year-Round Beauty
Indoor roses provide vibrant blooms and a delightful fragrance throughout the year, regardless of outdoor weather conditions. - Enhanced Home Aesthetics
Roses bring elegance and charm to any room. Their striking colors and lush appearance enhance interior decor effortlessly. - Improved Air Quality
Roses, like other indoor plants, can help purify the air by reducing toxins and increasing oxygen levels, creating a healthier living environment. - Stress Reduction
Caring for roses has therapeutic benefits. Watering, pruning, and nurturing these plants promote relaxation and reduce stress. - Protection from Outdoor Elements
Indoor roses are safe from pests, harsh weather, and diseases often affecting outdoor plants, ensuring healthier blooms. - Compact Gardening
Ideal for small spaces, indoor roses allow urban dwellers or apartment owners to enjoy gardening without needing outdoor areas. - Personalized Green Space
Creating an indoor rose garden lets you design a unique and tranquil space, fostering a connection to nature within your home.
Best Rose Types for Indoor Growing
Not all roses thrive indoors, but several varieties are well-suited for this environment. These rose types are compact, low-maintenance, and capable of blooming in controlled indoor conditions. Here are the best options:
- Miniature Roses
Miniature roses are the most popular choice for indoor gardening. They are compact, grow only 6–18 inches tall, and produce vibrant blooms in various colors. Their small size makes them perfect for pots and indoor spaces. - Patio Roses
Patio roses are slightly larger than miniature roses but still compact enough for indoor growing. They are hardy, produce abundant blooms, and thrive in containers with good sunlight. - Tea Roses
Although tea roses are traditionally grown outdoors, dwarf varieties can adapt to indoor conditions. Their classic, fragrant blooms add a luxurious touch to your home. - Floribunda Roses
Floribundas are known for their clusters of small to medium-sized blooms. Dwarf floribunda varieties work well indoors, providing bursts of vibrant color. - Polyantha Roses
Polyantha roses are resilient and compact, producing flower clusters ideal for small pots and limited indoor spaces. - Hybrid Dwarf Roses
Specially bred for container gardening, hybrid dwarf roses thrive indoors with proper care and offer a wide range of colors and fragrances.
How to Choose the Right Rose Variety for Indoor Growing
Selecting the perfect rose variety for indoor gardening is crucial for ensuring healthy growth and beautiful blooms. Here’s a step-by-step guide to help you choose:
1. Consider the Available Space
Assess the space where you’ll place the rose. Miniature and dwarf varieties are ideal for small spaces, while slightly larger varieties, like patio or floribunda roses, suit bigger areas.
2. Light Requirements
Roses need at least 6–8 hours of sunlight daily. Choose varieties that can adapt to moderate indoor lighting if natural sunlight is limited, or consider investing in grow lights.
3. Growth Habit
Compact and bushy rose varieties are better for indoor environments. Look for roses labeled as “miniature,” “dwarf,” or “patio” for manageable growth.
4. Fragrance Preference
If you enjoy fragrant roses, opt for varieties like hybrid tea or some miniature roses, which produce aromatic blooms that enhance your indoor environment.
5. Maintenance Level
Some roses require more care than others. Choose disease-resistant varieties or those bred for indoor gardening to minimize maintenance.
6. Bloom Color and Style
Select colors and bloom styles that match your home’s decor. With a variety of hues and petal shapes available, you can find roses that suit your aesthetic preferences.
Ideal Indoor Conditions for Roses

Creating the right environment is essential for growing healthy, thriving roses indoors. These delicate plants require specific conditions to flourish, and here’s how you can provide them:
1. Light Requirements
- Sunlight: Roses need at least 6–8 hours of bright, direct sunlight daily. Place them near a south- or west-facing window for the best light exposure.
- Supplemental Light: If natural light is insufficient, use full-spectrum grow lights to ensure your roses get adequate light for photosynthesis.
2. Temperature
- Optimal Range: Maintain indoor temperatures between 65–75°F (18–24°C) during the day and no lower than 60°F (15°C) at night.
- Avoid Extremes: Keep roses away from drafts, air conditioning vents, and heat sources to prevent stress and damage.
3. Humidity
- Moderate Levels: Roses prefer a humidity level of 40–60%.
- Improving Humidity: Use a humidifier, mist the leaves lightly, or place a water-filled tray with pebbles nearby to maintain consistent moisture in the air.
4. Soil
- Use well-draining, nutrient-rich soil to prevent waterlogging and support root health. A mix of garden soil, compost, and perlite works well.
5. Watering
- Regular Hydration: Water roses when the top inch of soil feels dry. Ensure the pot drains excess water to avoid root rot.
- Consistent Moisture: Keep the soil evenly moist, but never soggy.
6. Ventilation
- Provide good air circulation around the plant to reduce the risk of fungal diseases. Open windows periodically or use a small fan to improve airflow.
7. Fertilization
- Feed your roses with a balanced liquid fertilizer every 2–4 weeks during their growing season. Organic options like compost tea are also effective.
8. Pruning and Maintenance
- Regularly prune dead leaves and faded blooms to encourage new growth and maintain the plant’s shape. Clean leaves occasionally to prevent dust buildup.
Step-by-Step Planting Guide for Indoor Roses

Planting roses indoors requires careful preparation and attention to detail. Follow this step-by-step guide to get your roses off to a great start:
Step 1: Choose the Right Rose Variety
- Select compact varieties like miniature, patio, or hybrid dwarf roses for indoor growth.
- Opt for disease-resistant and low-maintenance types.
Step 2: Select the Perfect Pot
- Use a container with drainage holes to prevent waterlogging.
- Ensure the pot is at least 8–12 inches deep for root growth.
Step 3: Prepare the Soil
- Use well-draining, nutrient-rich soil. A mix of garden soil, compost, and perlite works well.
- Ensure the soil is slightly acidic, with a pH between 6.0 and 6.5.
Step 4: Plant the Rose
- Fill the pot halfway with prepared soil.
- Place the rose plant or root ball in the center, ensuring the crown (where the stems meet the roots) is just above the soil level.
- Fill in with soil around the roots, gently pressing to eliminate air pockets.
Step 5: Water Thoroughly
- Water the rose until moisture drains from the bottom of the pot.
- Keep the soil evenly moist but avoid overwatering.
Step 6: Position in Bright Light
- Place the pot near a sunny window with at least 6–8 hours of direct sunlight daily.
- Use grow lights if natural light is insufficient.
Step 7: Monitor and Maintain
- Feed roses with a balanced fertilizer every 2–4 weeks.
- Prune faded blooms and dead leaves regularly.
Tips for Transplanting Roses
Transplanting indoor roses may be necessary when they outgrow their pots or need a healthier environment. Here’s how to do it:
1. Choose the Right Time
- Transplant during the dormant season (late fall to early spring) for minimal stress.
- Avoid transplanting when the rose is actively blooming.
2. Select a Larger Pot
- Choose a pot 2–4 inches larger in diameter than the current one to accommodate root growth.
3. Prepare the New Pot
- Fill the new pot with fresh, well-draining soil.
- Mix compost or organic matter for added nutrients.
4. Remove the Rose Gently
- Loosen the soil around the plant carefully.
- Tilt the pot slightly and gently pull out the rose, ensuring the root ball stays intact.
5. Replant in the New Pot
- Place the rose in the new pot, ensuring the crown is slightly above the soil line.
- Fill in the remaining space with fresh soil, pressing gently around the roots.
6. Water and Position
- Water thoroughly to help the roots settle.
- Position the rose in a bright, well-lit area with consistent conditions.
7. Monitor for Stress
- Watch for signs of transplant shock, such as wilting or yellowing leaves.
- Maintain consistent watering and avoid fertilizing for 2–3 weeks post-transplant to allow the plant to adjust.
Repotting Indoor Roses: A Step-by-Step Guide

Repotting indoor roses is essential to ensure their healthy growth and vibrant blooms. Follow these steps to repot your roses effectively:
1. Choose the Right Time
- The best time to repot indoor roses is during their dormant phase, typically late winter or early spring.
- Avoid repotting when the plant is in full bloom.
2. Select a Suitable Pot
- Choose a pot slightly larger than the current one, ensuring it has drainage holes.
- A 2–4-inch increase in diameter is ideal.
3. Prepare the New Soil
- Use high-quality potting soil formulated for roses or flowering plants.
- Enrich the soil with organic matter, like compost or aged manure, for added nutrients.
4. Remove the Rose from Its Current Pot
- Water the rose thoroughly a day before repotting to ease removal.
- Gently tilt the pot and slide the plant out while holding the base of the stem.
- Avoid pulling forcefully to prevent damage to the roots.
5. Prune the Roots and Dead Material
- Trim away any dead, damaged, or overly long roots using clean scissors.
- Remove yellow or dry leaves to reduce stress on the plant.
6. Repot the Rose
- Place a layer of fresh soil at the bottom of the new pot.
- Position the rose in the center, spreading the roots evenly.
- Fill the pot with soil, ensuring the crown (where the stem meets the roots) is just above the soil line.
- Firmly but gently press the soil around the roots.
7. Water Thoroughly
- Water the rose until excess water drains from the bottom.
- Ensure consistent moisture in the following weeks without waterlogging.
8. Provide Proper Care
- Place the rose in a bright location with indirect sunlight.
- Feed with a balanced rose fertilizer after a few weeks to encourage growth.
Common Mistakes in Repotting Indoor Roses and How to Avoid Them
Repotting indoor roses is a delicate process, and making mistakes can stress or damage the plant. Below are common mistakes and tips on how to avoid them:
1. Choosing the Wrong Time for Repotting
Mistake: Repotting during the blooming phase or extreme weather conditions.
Solution: Always repot during the dormant season (late winter or early spring) when the plant is least active.
2. Using the Wrong Type of Pot
Mistake: Selecting a pot that is too large or lacks proper drainage.
Solution: Choose a pot 2–4 inches larger than the current one and ensure it has drainage holes to prevent waterlogging.
3. Poor Soil Choice
Mistake: Using regular garden soil, which may compact and lack nutrients.
Solution: Use well-draining potting soil formulated for roses or flowering plants, enriched with organic matter.
4. Overwatering or Underwatering
Mistake: Watering inconsistently after repotting, leading to root stress or rot.
Solution: Water thoroughly immediately after repotting and maintain consistent moisture without saturating the soil.
5. Failing to Prune Damaged Roots and Leaves
Mistake: Leaving dead or damaged roots and leaves on the plant, which can attract pests or disease.
Solution: Inspect and prune damaged roots and leaves before placing the plant in its new pot.
6. Planting Too Deeply or Shallowly
Mistake: Placing the rose too deep or too high in the soil, which can suffocate the crown or expose roots.
Solution: Position the plant so that the crown is just above the soil line.
7. Forgetting to Harden Off the Plant
Mistake: Immediately placing the repotted rose in direct sunlight, causing leaf burn.
Solution: Allow the plant to adjust by keeping it in a bright spot with indirect sunlight for a few days before introducing more direct light.
8. Neglecting Post-Repotting Care
Mistake: Skipping essential care like fertilization or pest monitoring after repotting.
Solution: Begin light feeding with a rose fertilizer 2–3 weeks after repotting and check regularly for pests or signs of stress.
9. Repotting Too Often
Mistake: Repotting the plant too frequently, disrupting its growth.
Solution: Repot only when necessary, typically every 1–2 years or when the plant outgrows its pot
Conclusion
Repotting indoor roses is a vital process to ensure their continued health, growth, and beauty. By selecting the right time, using appropriate materials, and following proper techniques, you can provide your roses with the best environment to thrive. Avoid common mistakes by being attentive to their needs and providing consistent care post-repotting. With patience and effort, your indoor roses will reward you with vibrant foliage and stunning blooms for years to come.
Frequently Asked Questions
1. How often should I repot my indoor roses?
Repot your indoor roses every 1–2 years or when you notice the plant becoming root-bound or the soil losing its quality.
2. What type of soil is best for indoor roses?
Use well-draining potting soil formulated for roses or flowering plants. Enrich it with compost or organic matter for added nutrients.
3. Can I repot my roses while they are blooming?
It’s best to avoid repotting during the blooming phase, as it can stress the plant. Wait until the dormant season (late winter or early spring) for the best results.
4. What should I do if my rose shows signs of stress after repotting?
If your rose shows signs of wilting or leaf drop, ensure it is not overwatered or placed in direct sunlight. Keep it in a bright, indirect light location and monitor moisture levels.
5. How can I tell if my rose needs repotting?
Signs include roots growing out of the drainage holes, soil that dries out too quickly, or a lack of new growth despite proper care.
6. Do indoor roses need fertilizer after repotting?
Yes, but wait 2–3 weeks after repotting to start fertilizing. Use a balanced rose fertilizer to promote healthy growth.
7. Can I use the same pot when repotting?
You can use the same pot if the rose has not outgrown it, but replace the old soil with fresh potting mix to provide new nutrients.
8. Should I water my rose immediately after repotting?
Yes, water thoroughly after repotting to help the soil settle around the roots and prevent air pockets.
9. What size pot is ideal for repotting indoor roses?
Choose a pot that is 2–4 inches larger in diameter than the current one to allow room for root growth.
10. Is it necessary to prune the roots during repotting?
Pruning damaged, dead, or excessively long roots helps the plant focus on healthy growth and prevents disease.


